

How to transform a classic green/blue wooden playhouse into a nordic-styled fairytale playhouse? I might as well admit, that I am NOT a DIY person, but I love making Clara happy – and this project was the perfect surprise for my little girl
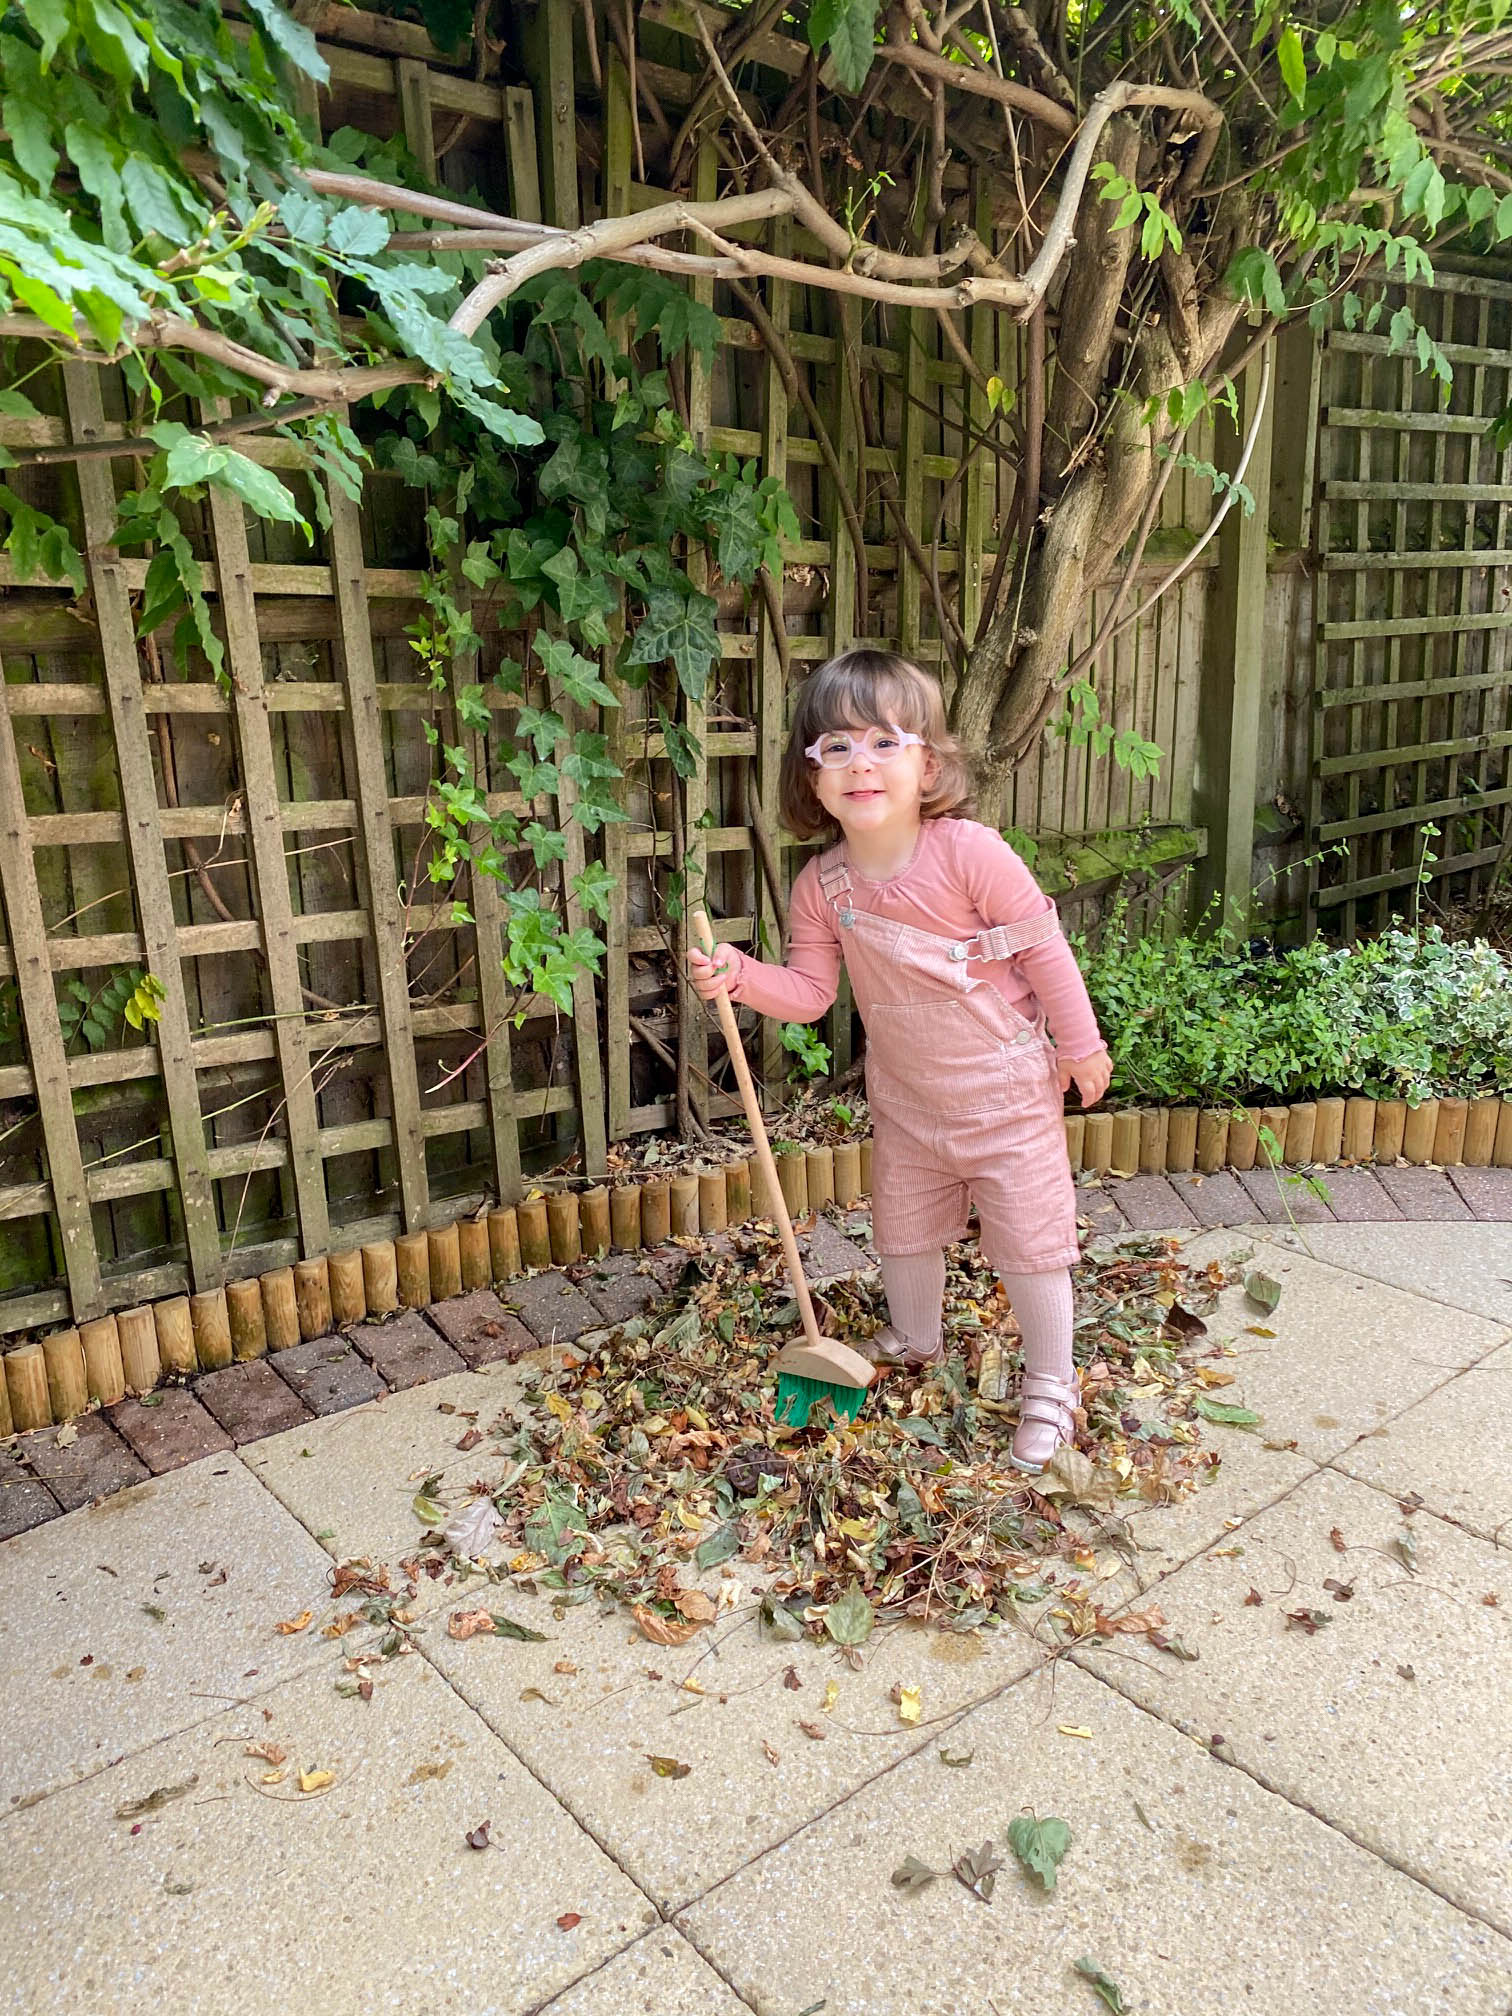
First, one must clean up in the garden before the new “Casa del Clara” arrives! Look at her little face! She was so excited!
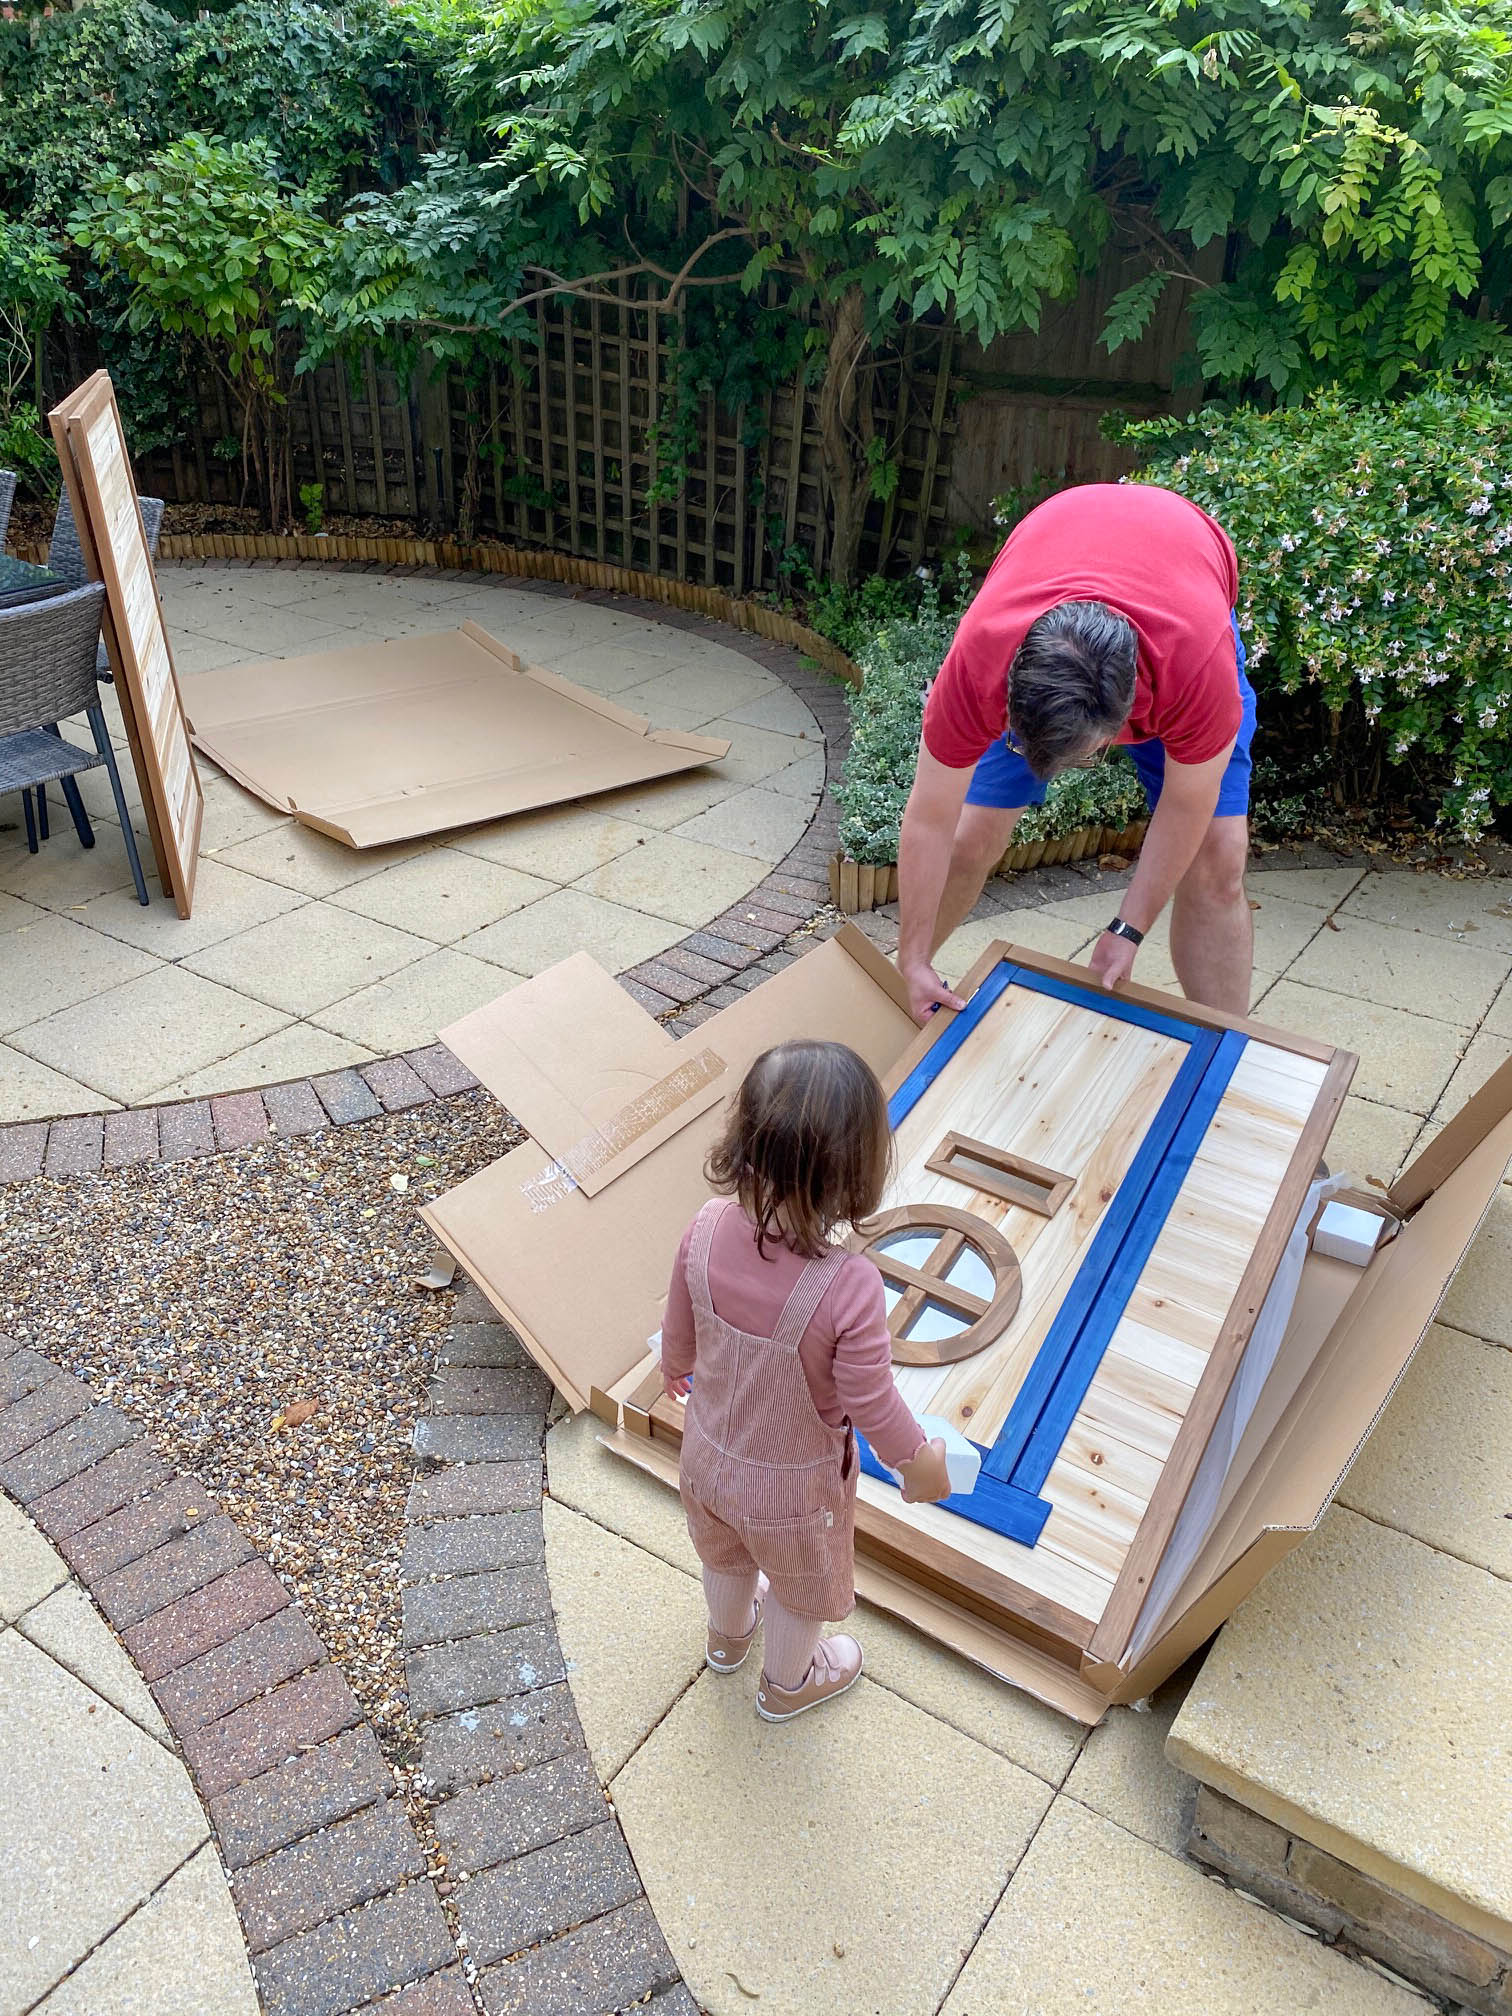
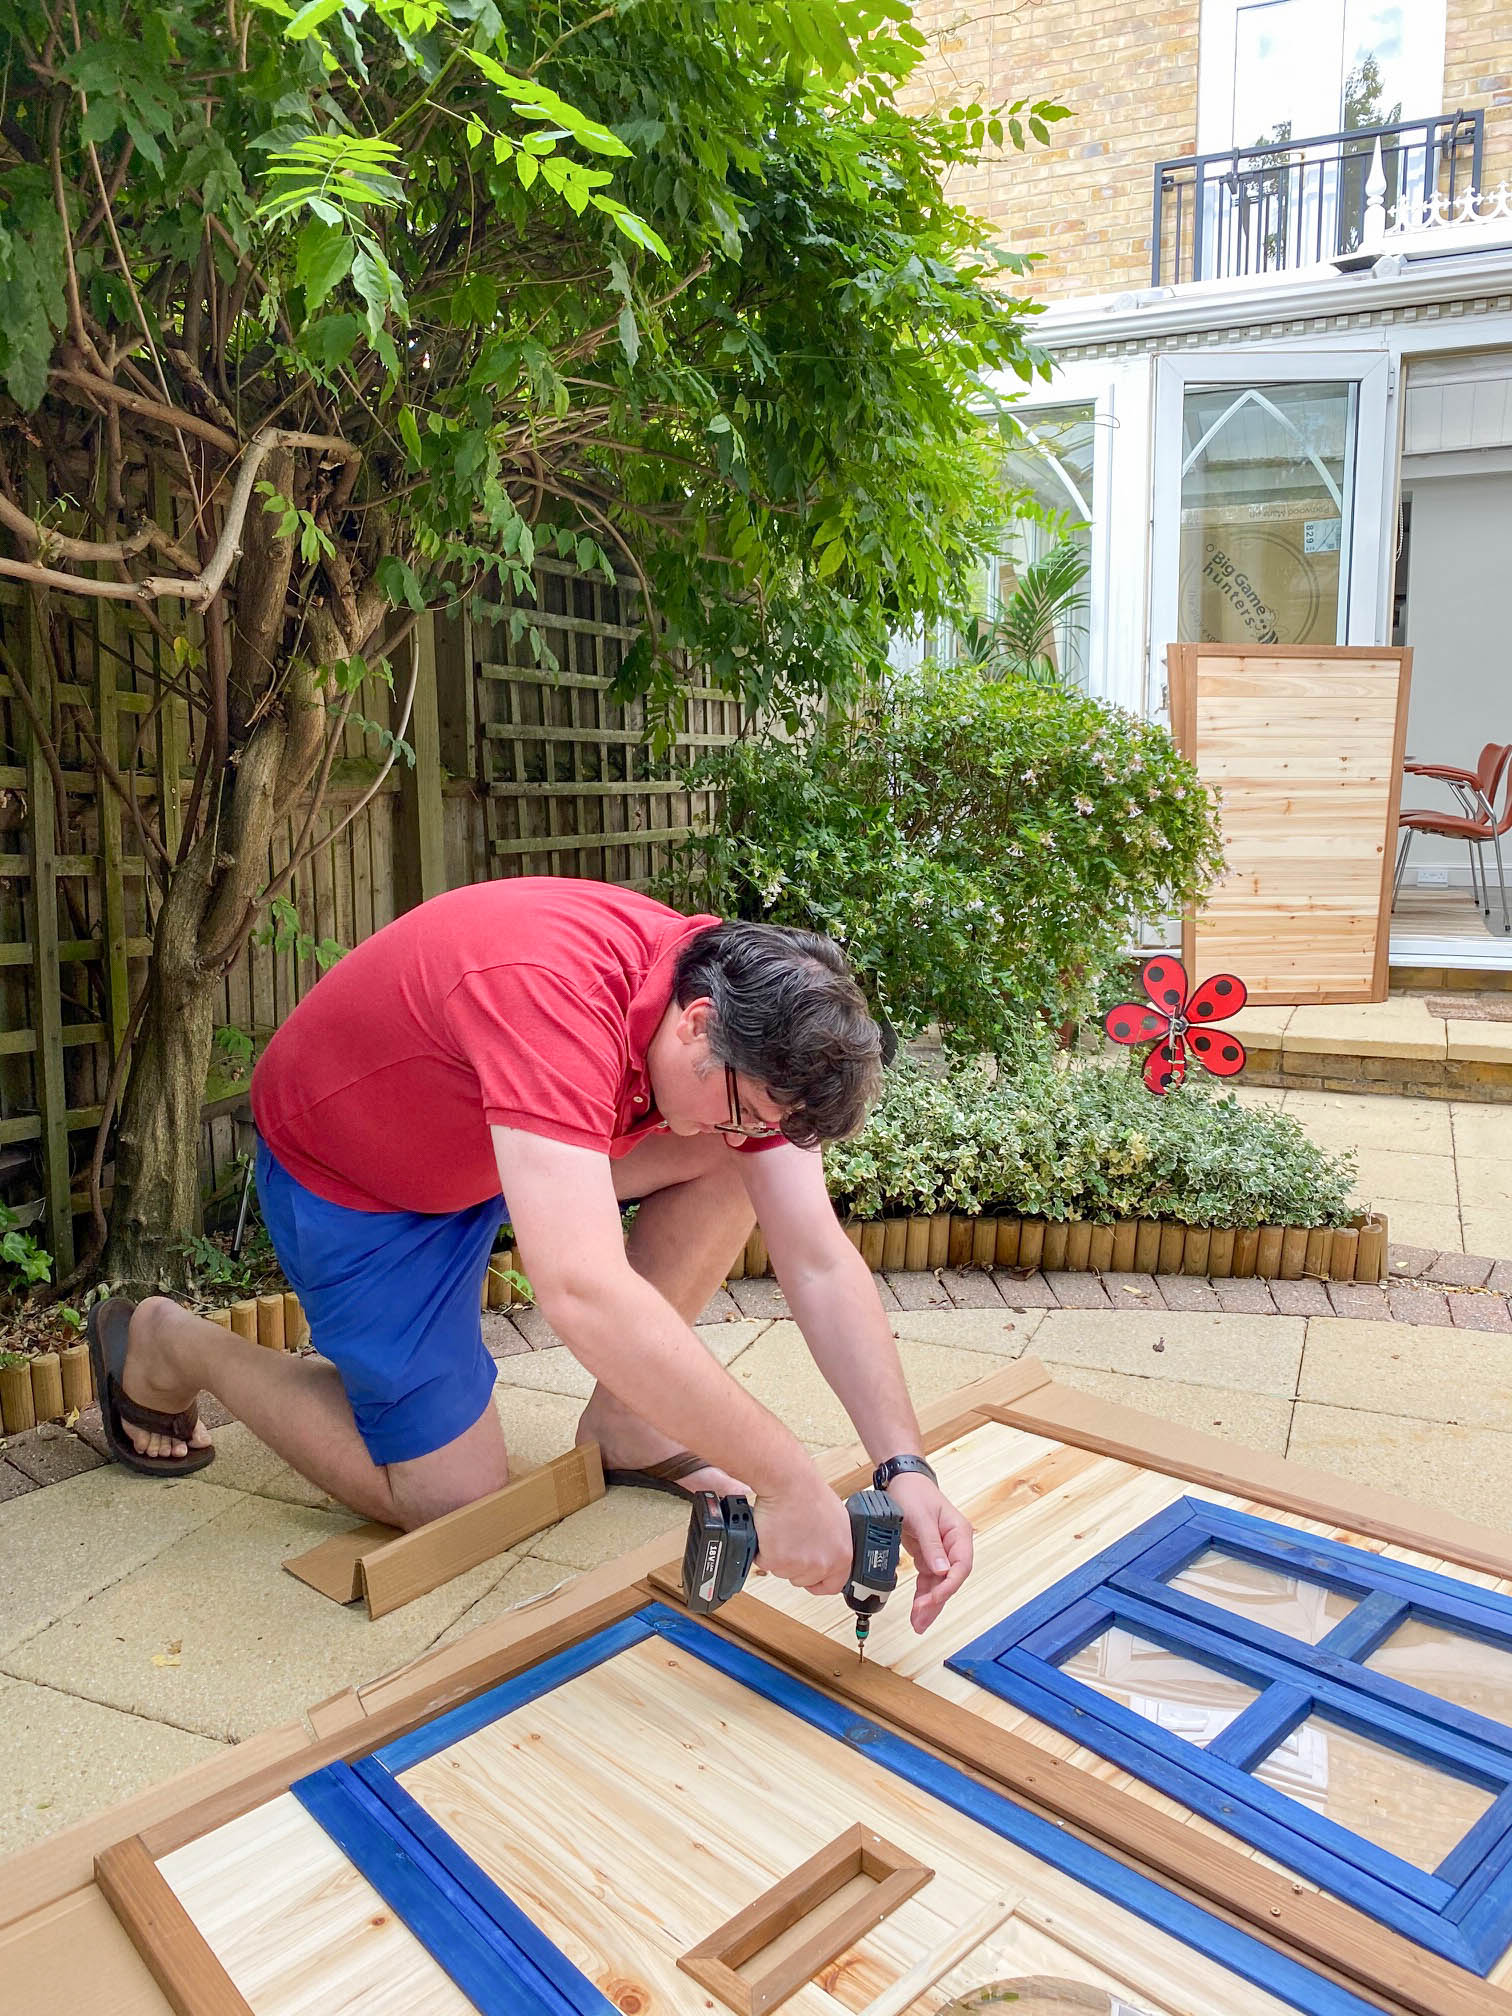
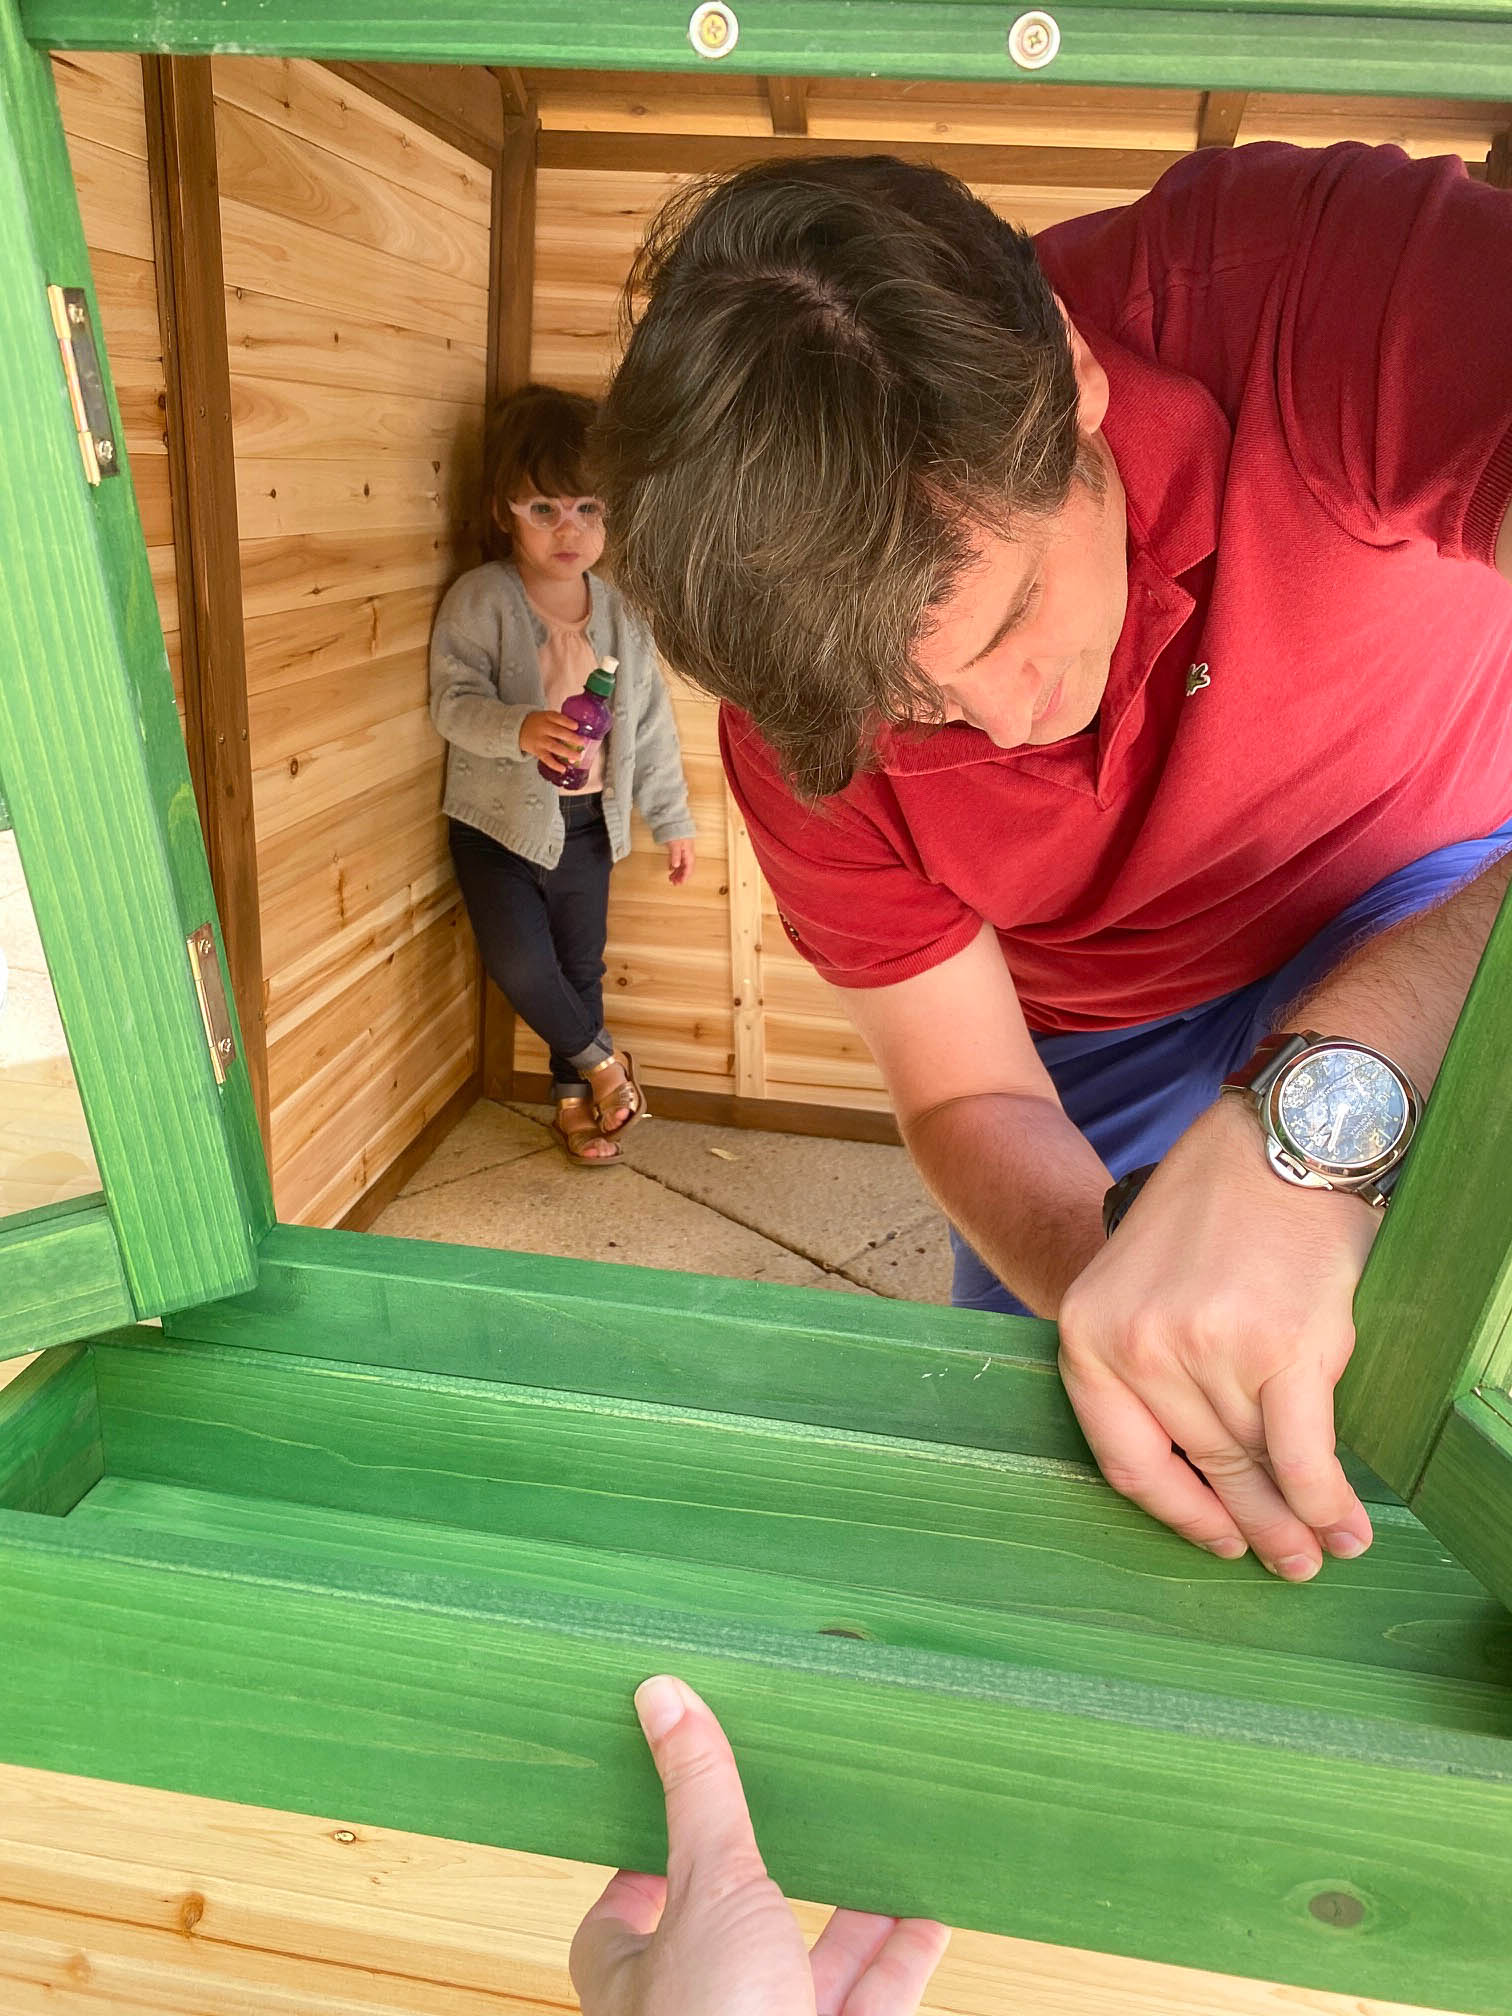
It was a sunny Sunday afternoon when Frenchie and Clara started to build Clara’s new Redwood Mansion Playhouse from Big Game Hunters
Clara was super curious – and I am sure, she knew that the outcome of the daddy/daughter project would be pretty amazing!
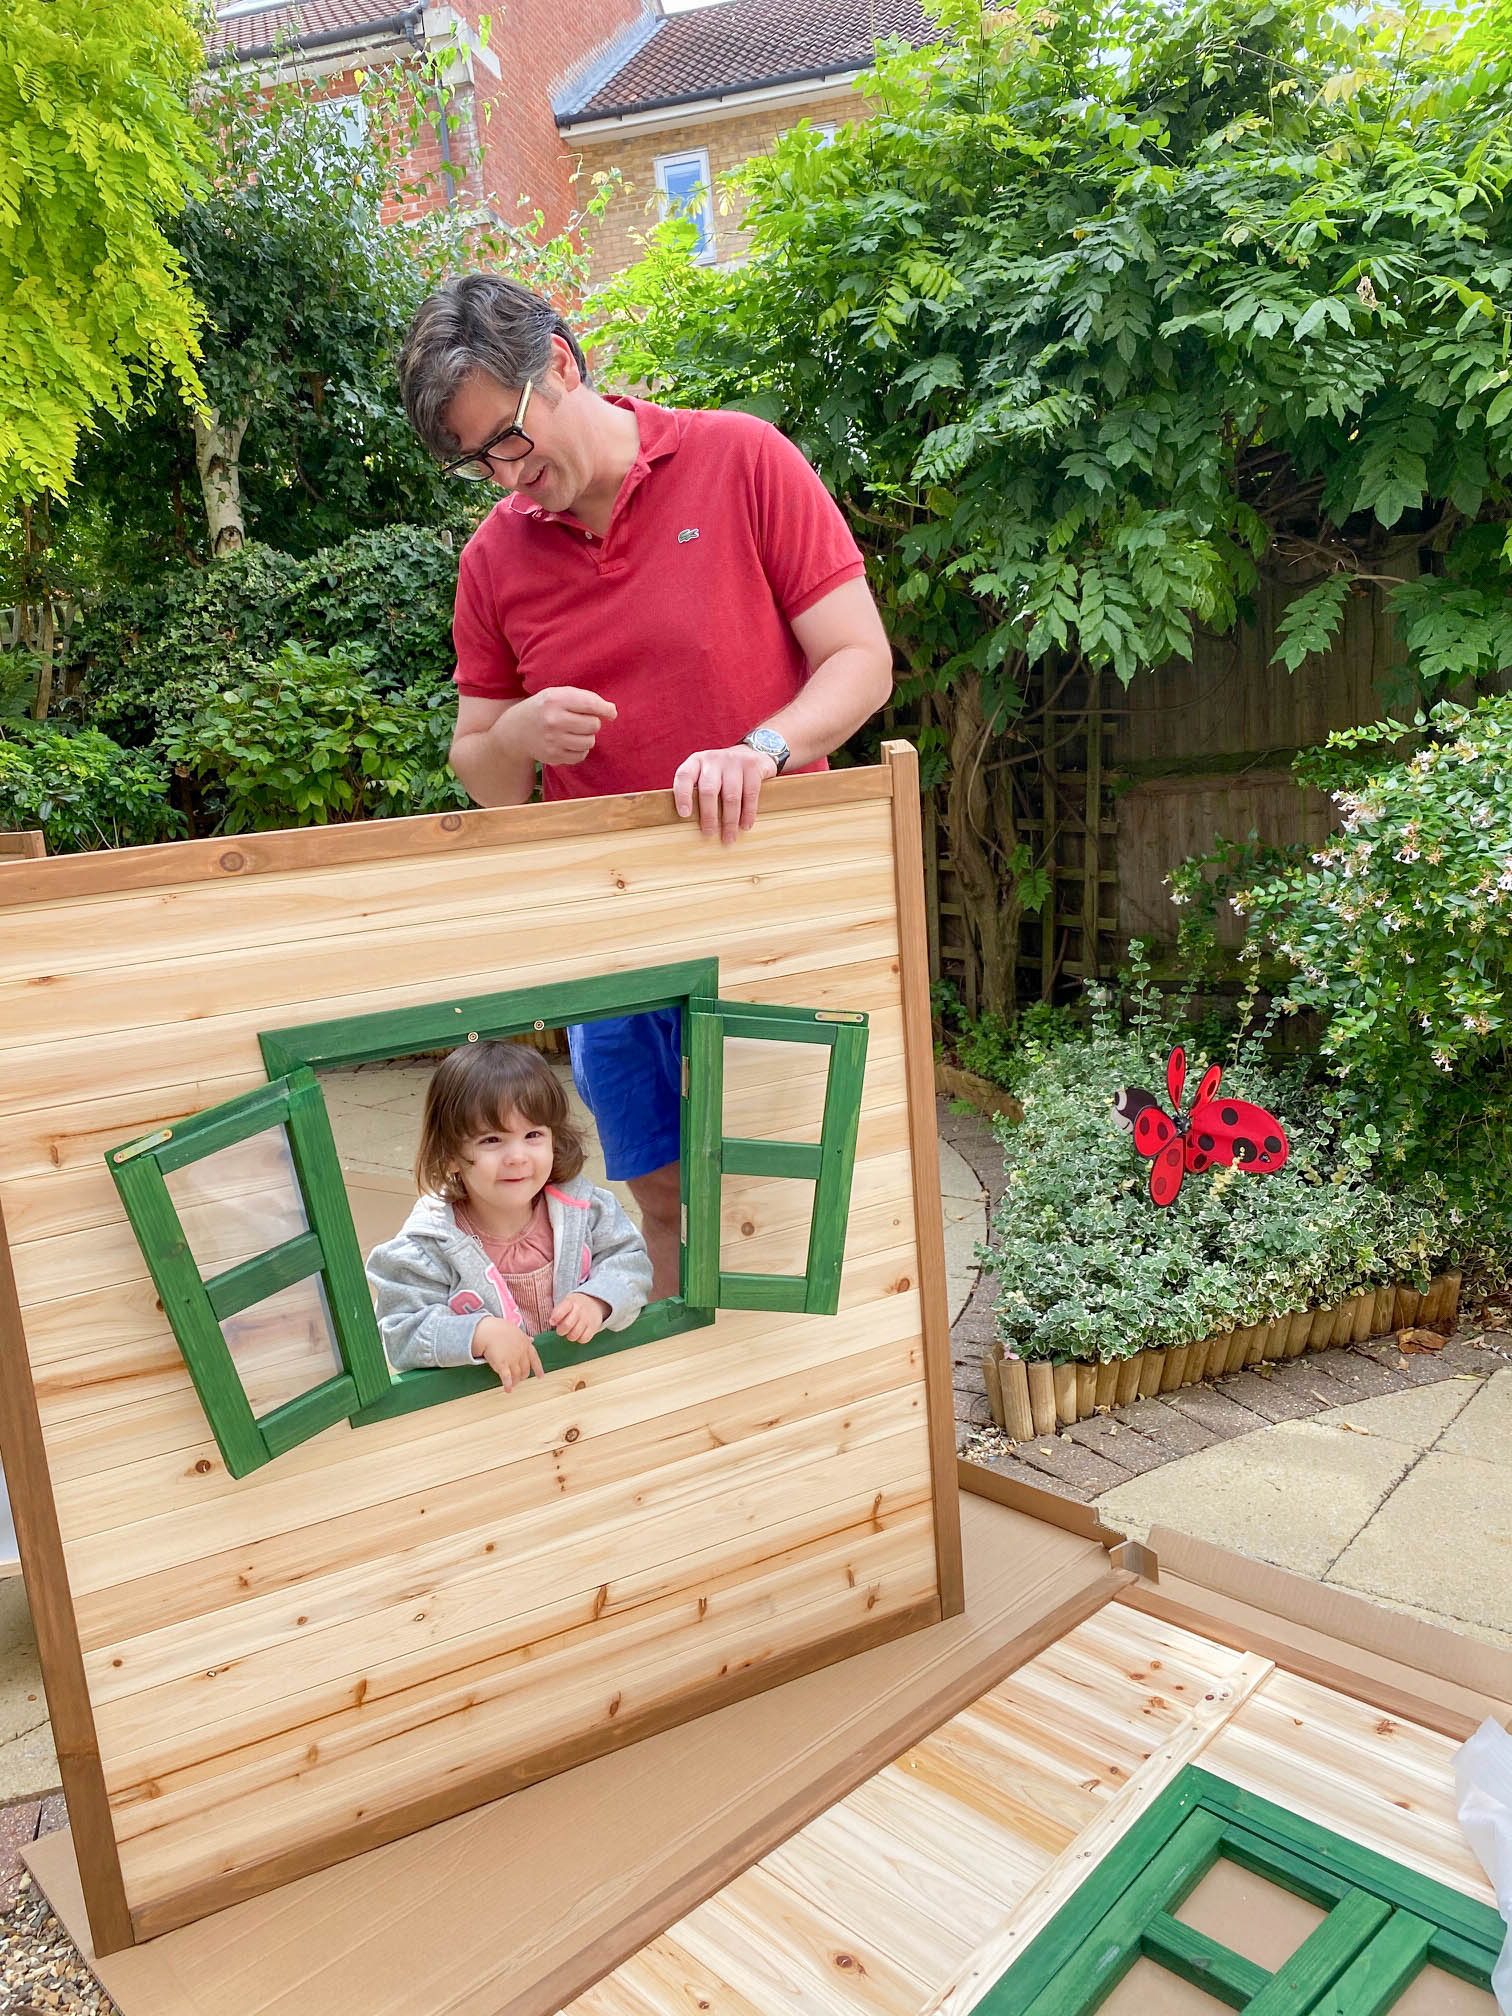
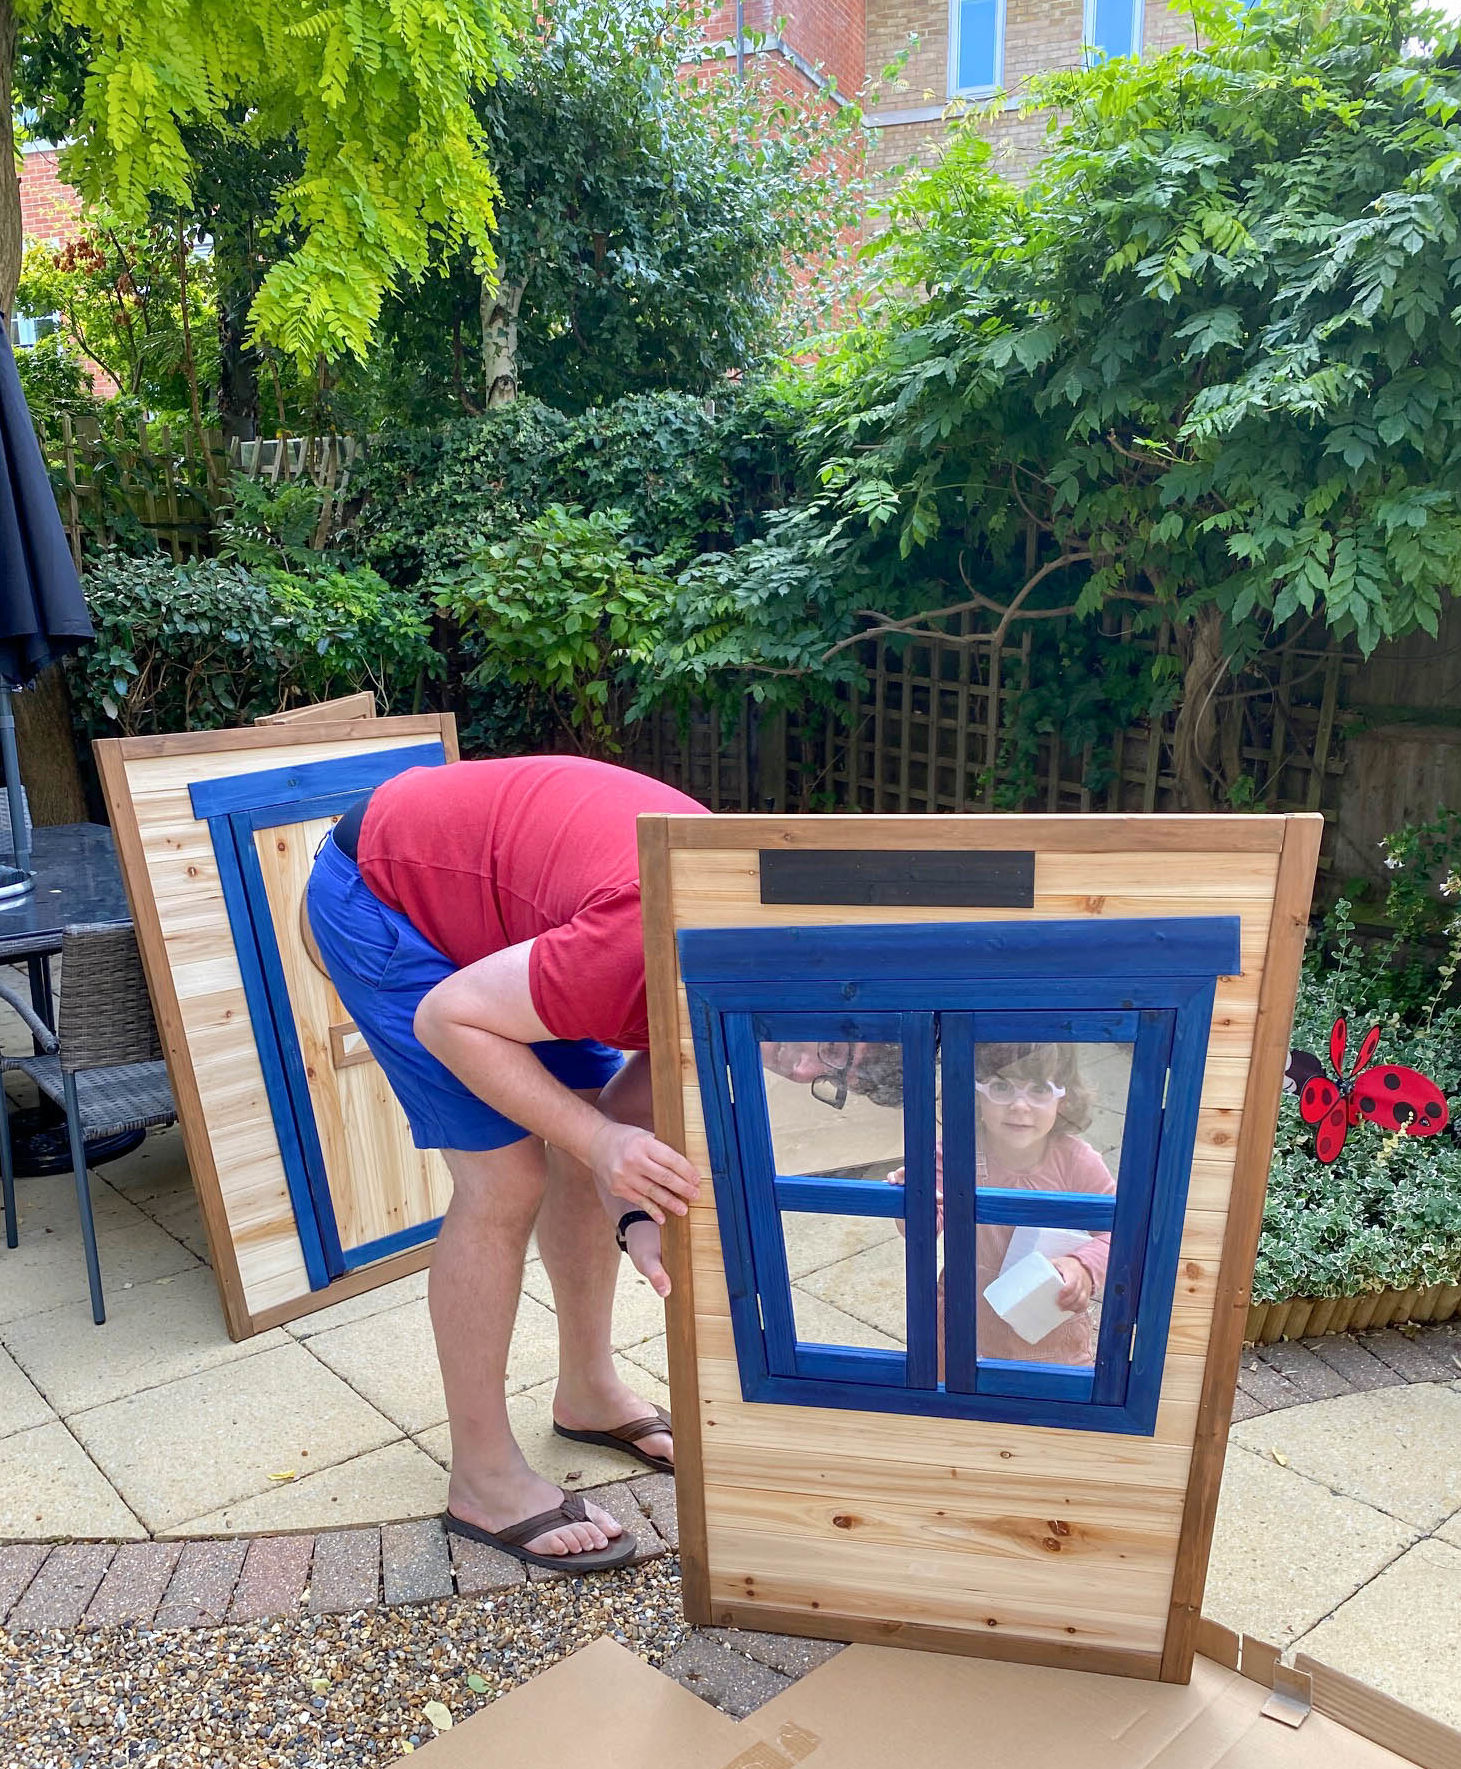
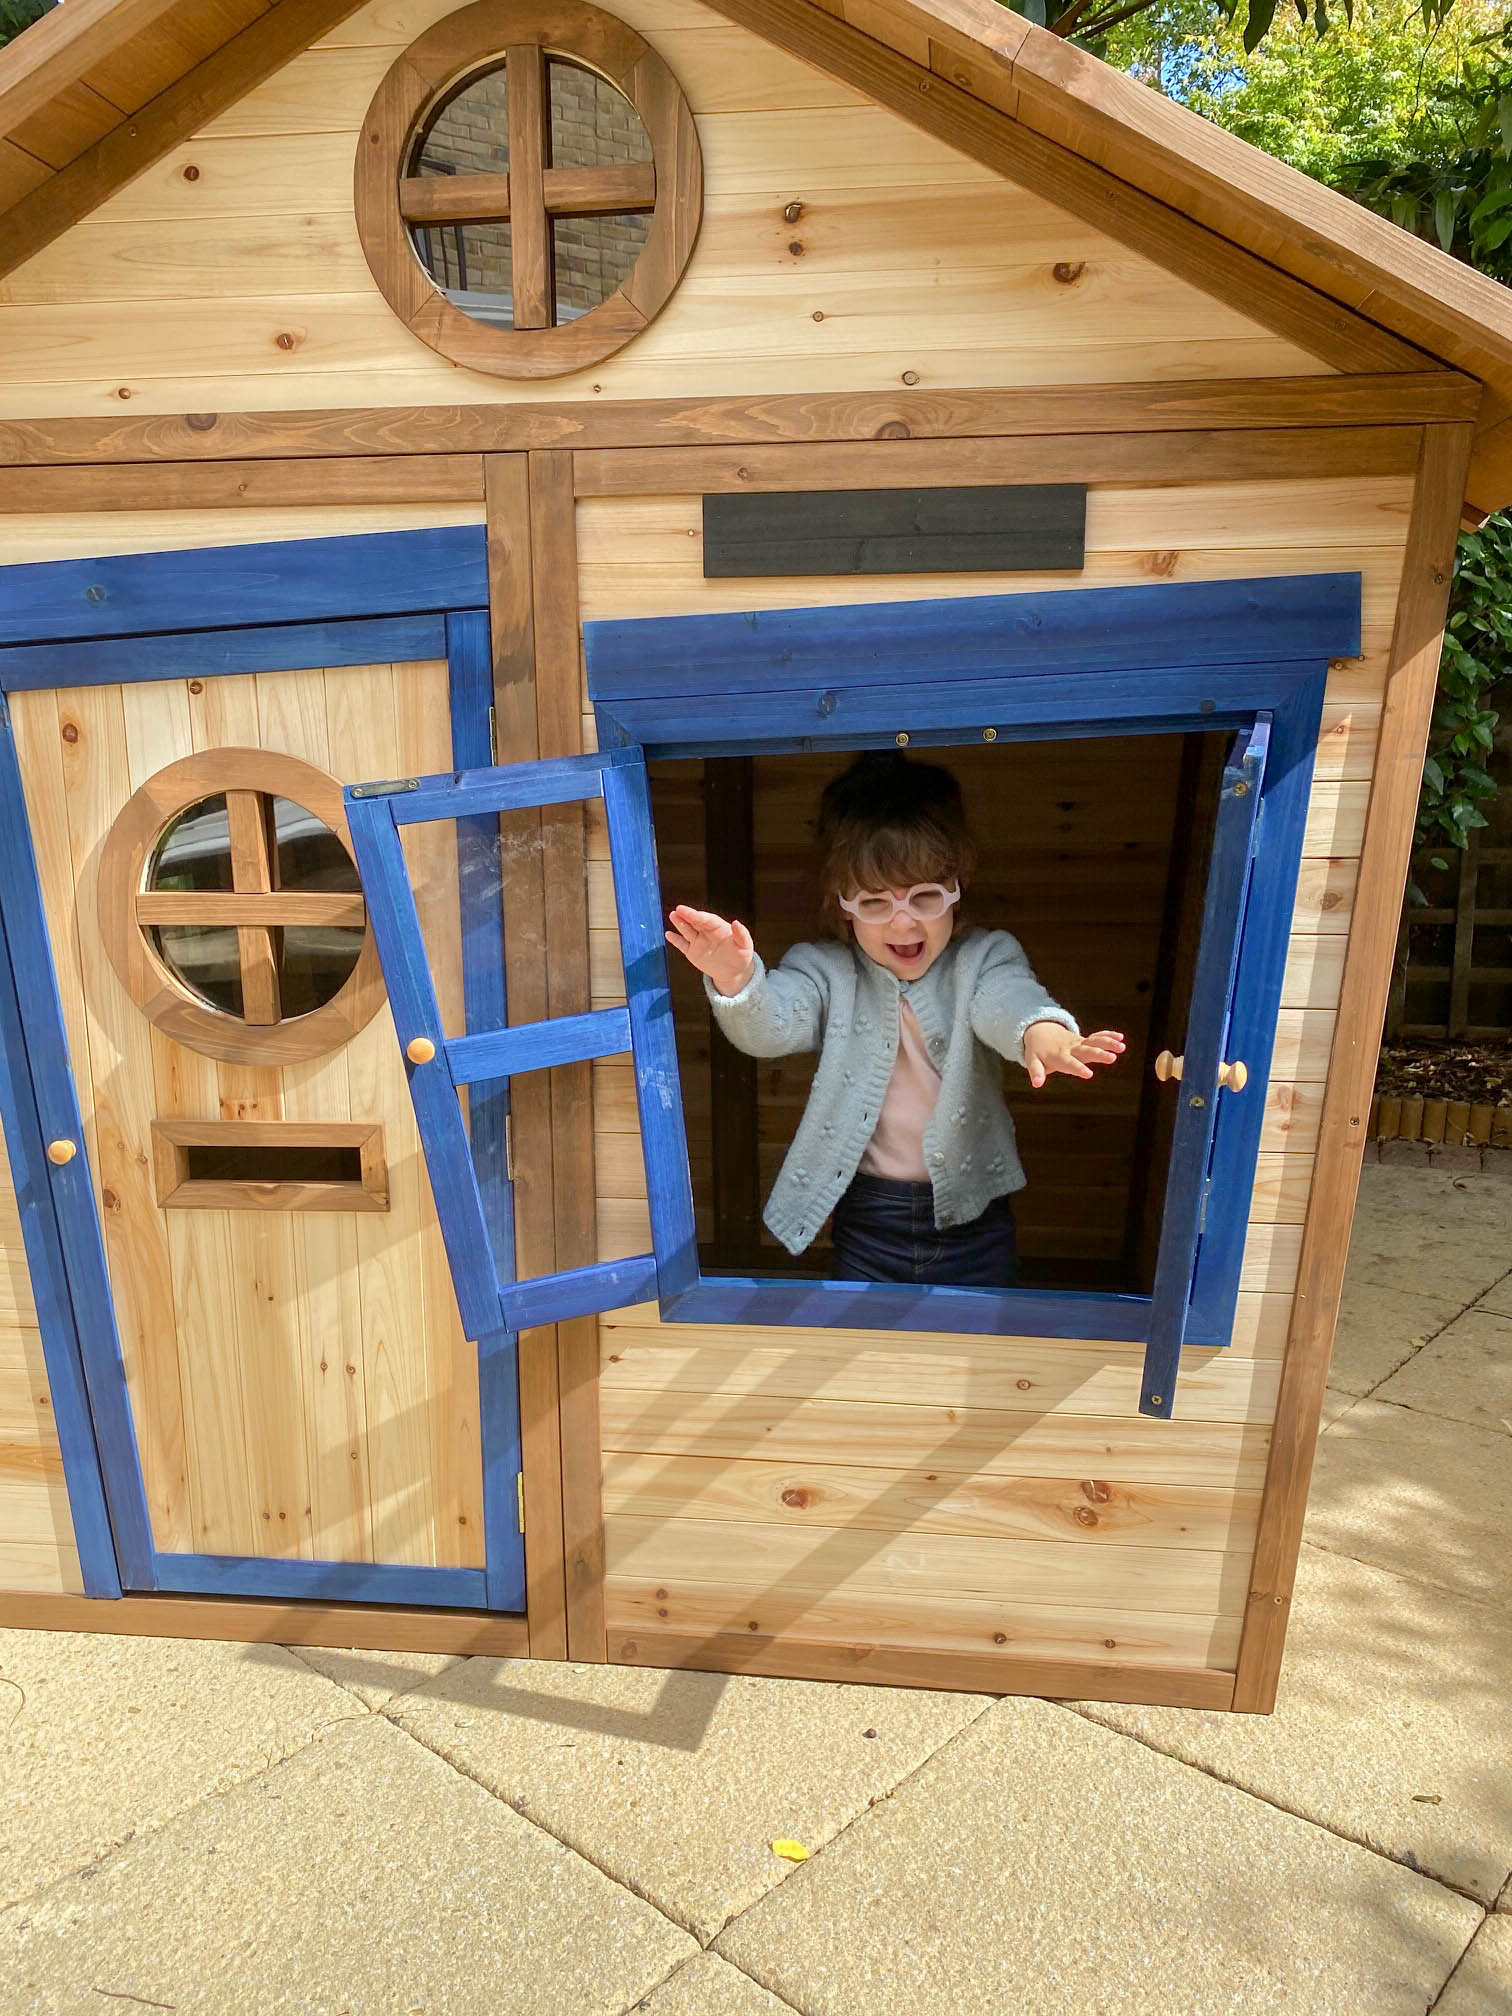
Peekaboo! (The windows are fitted with safety Styrene, giving the appearance of real glass windows for imaginary play)
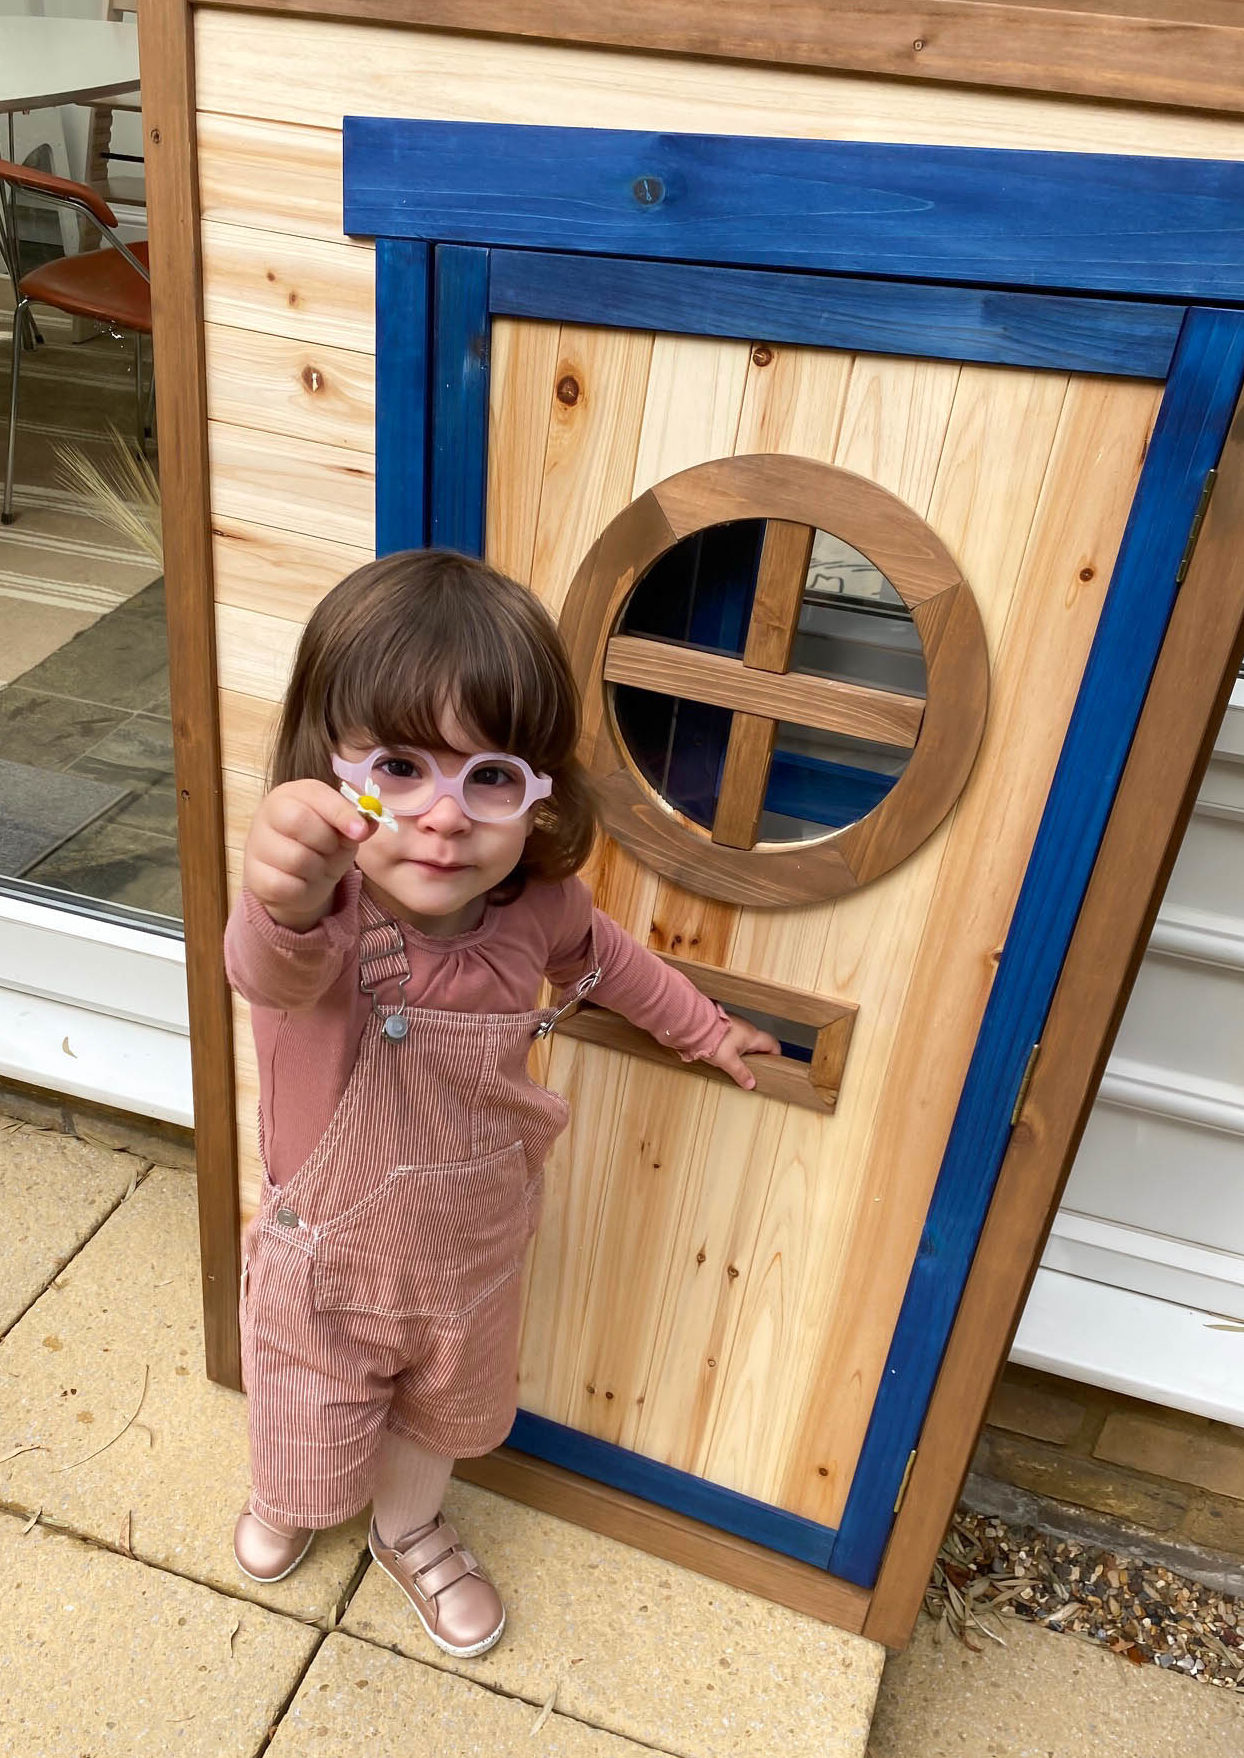
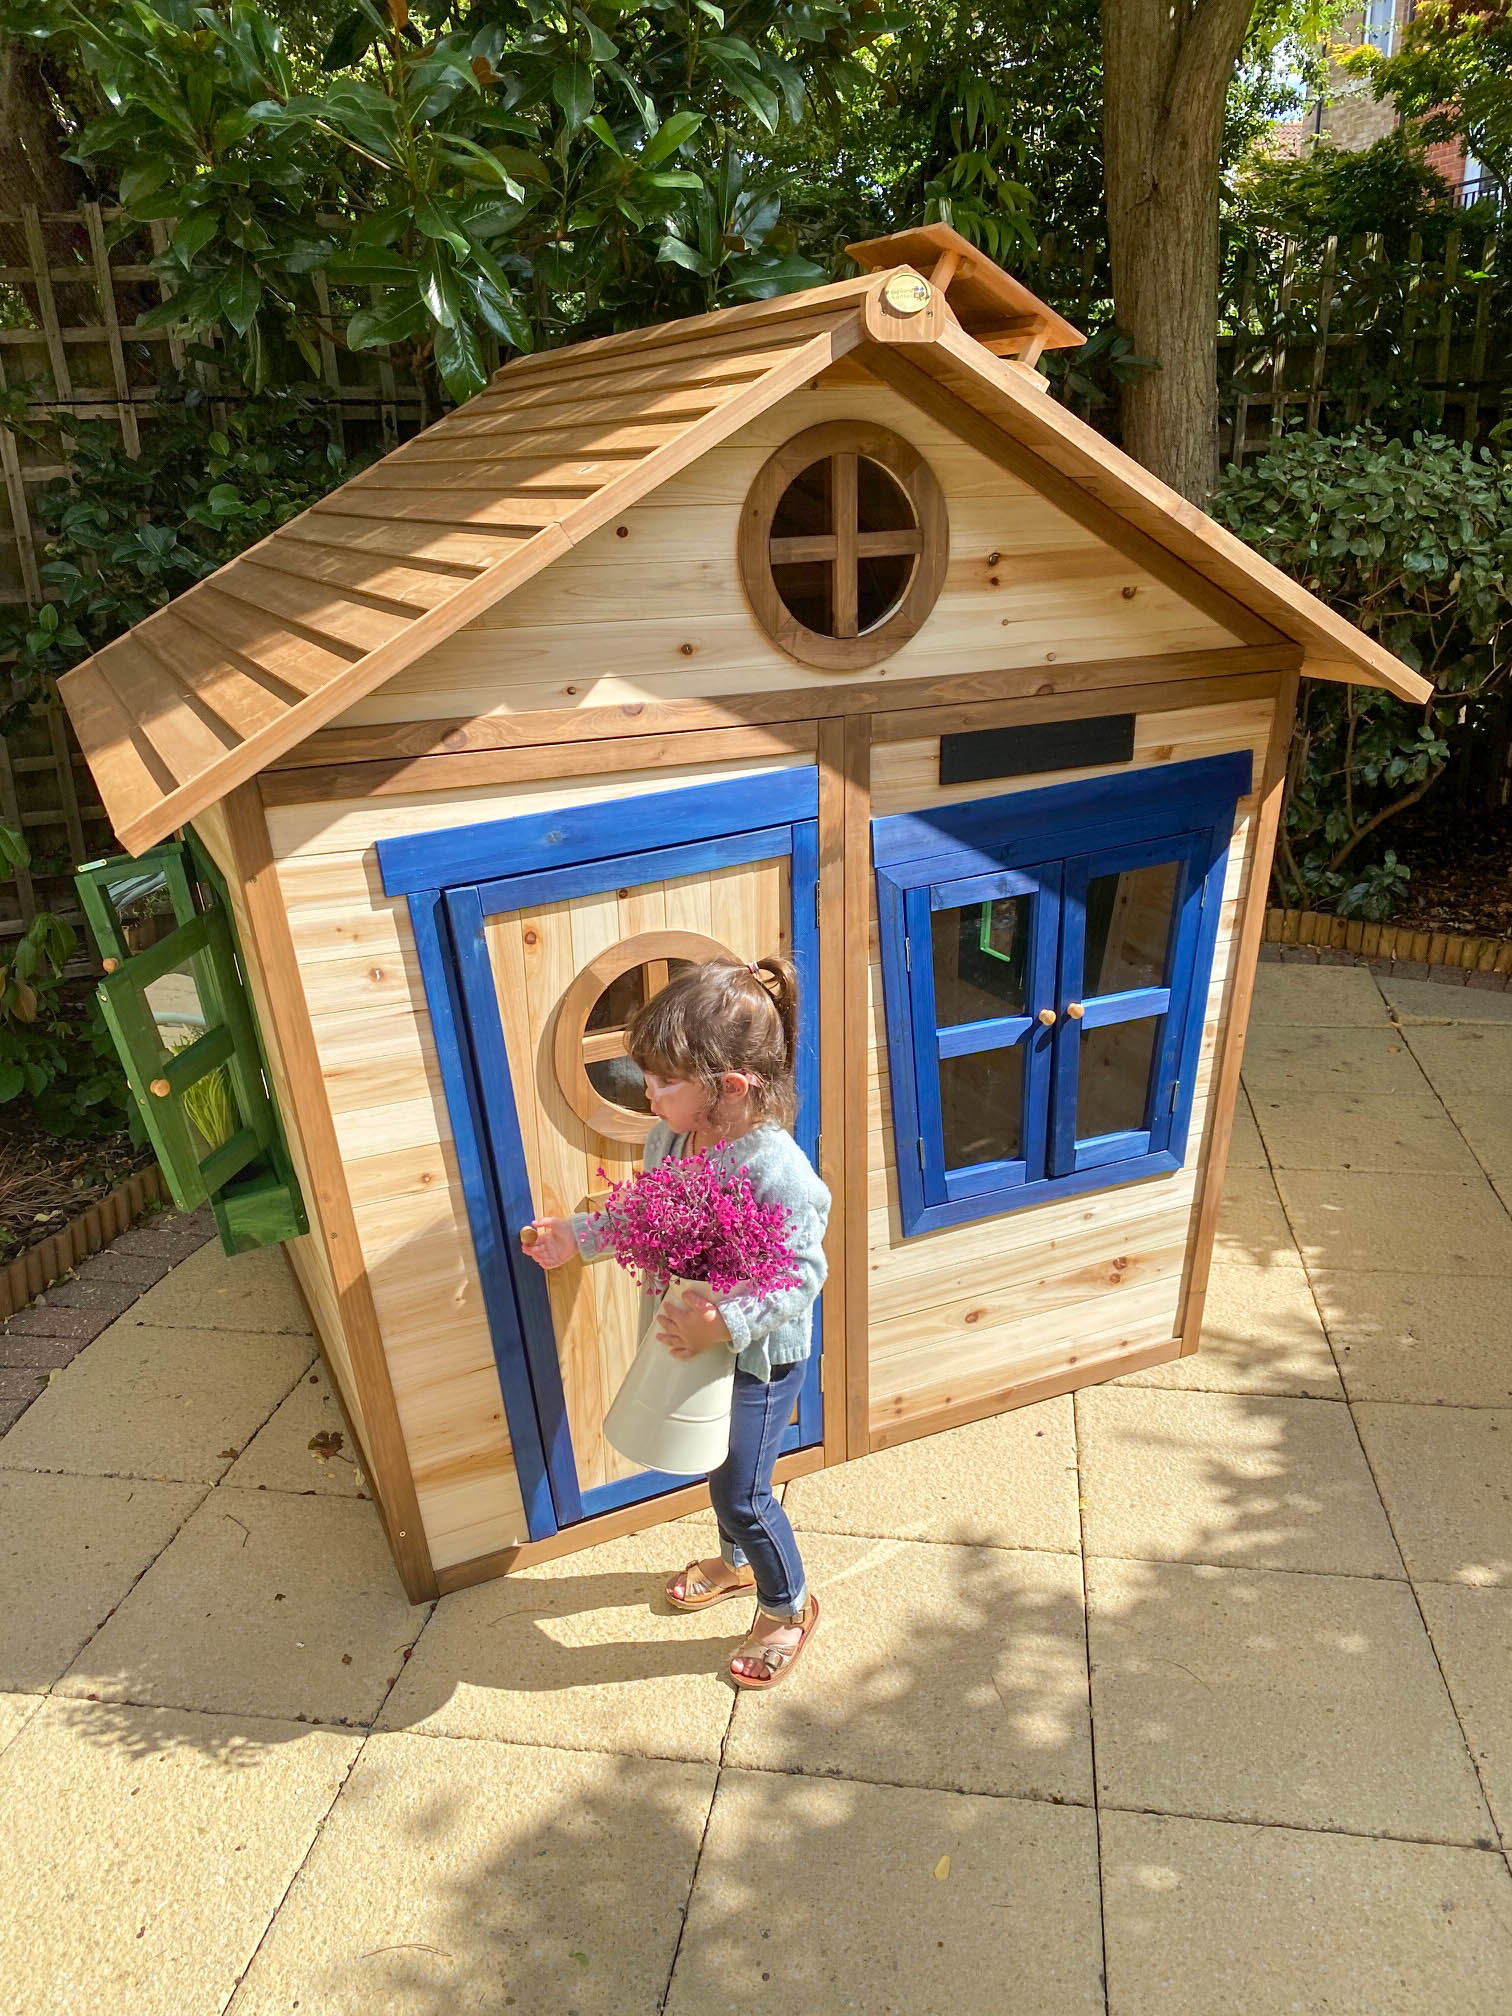
Putting flowers through the letterbox is a hit these days!
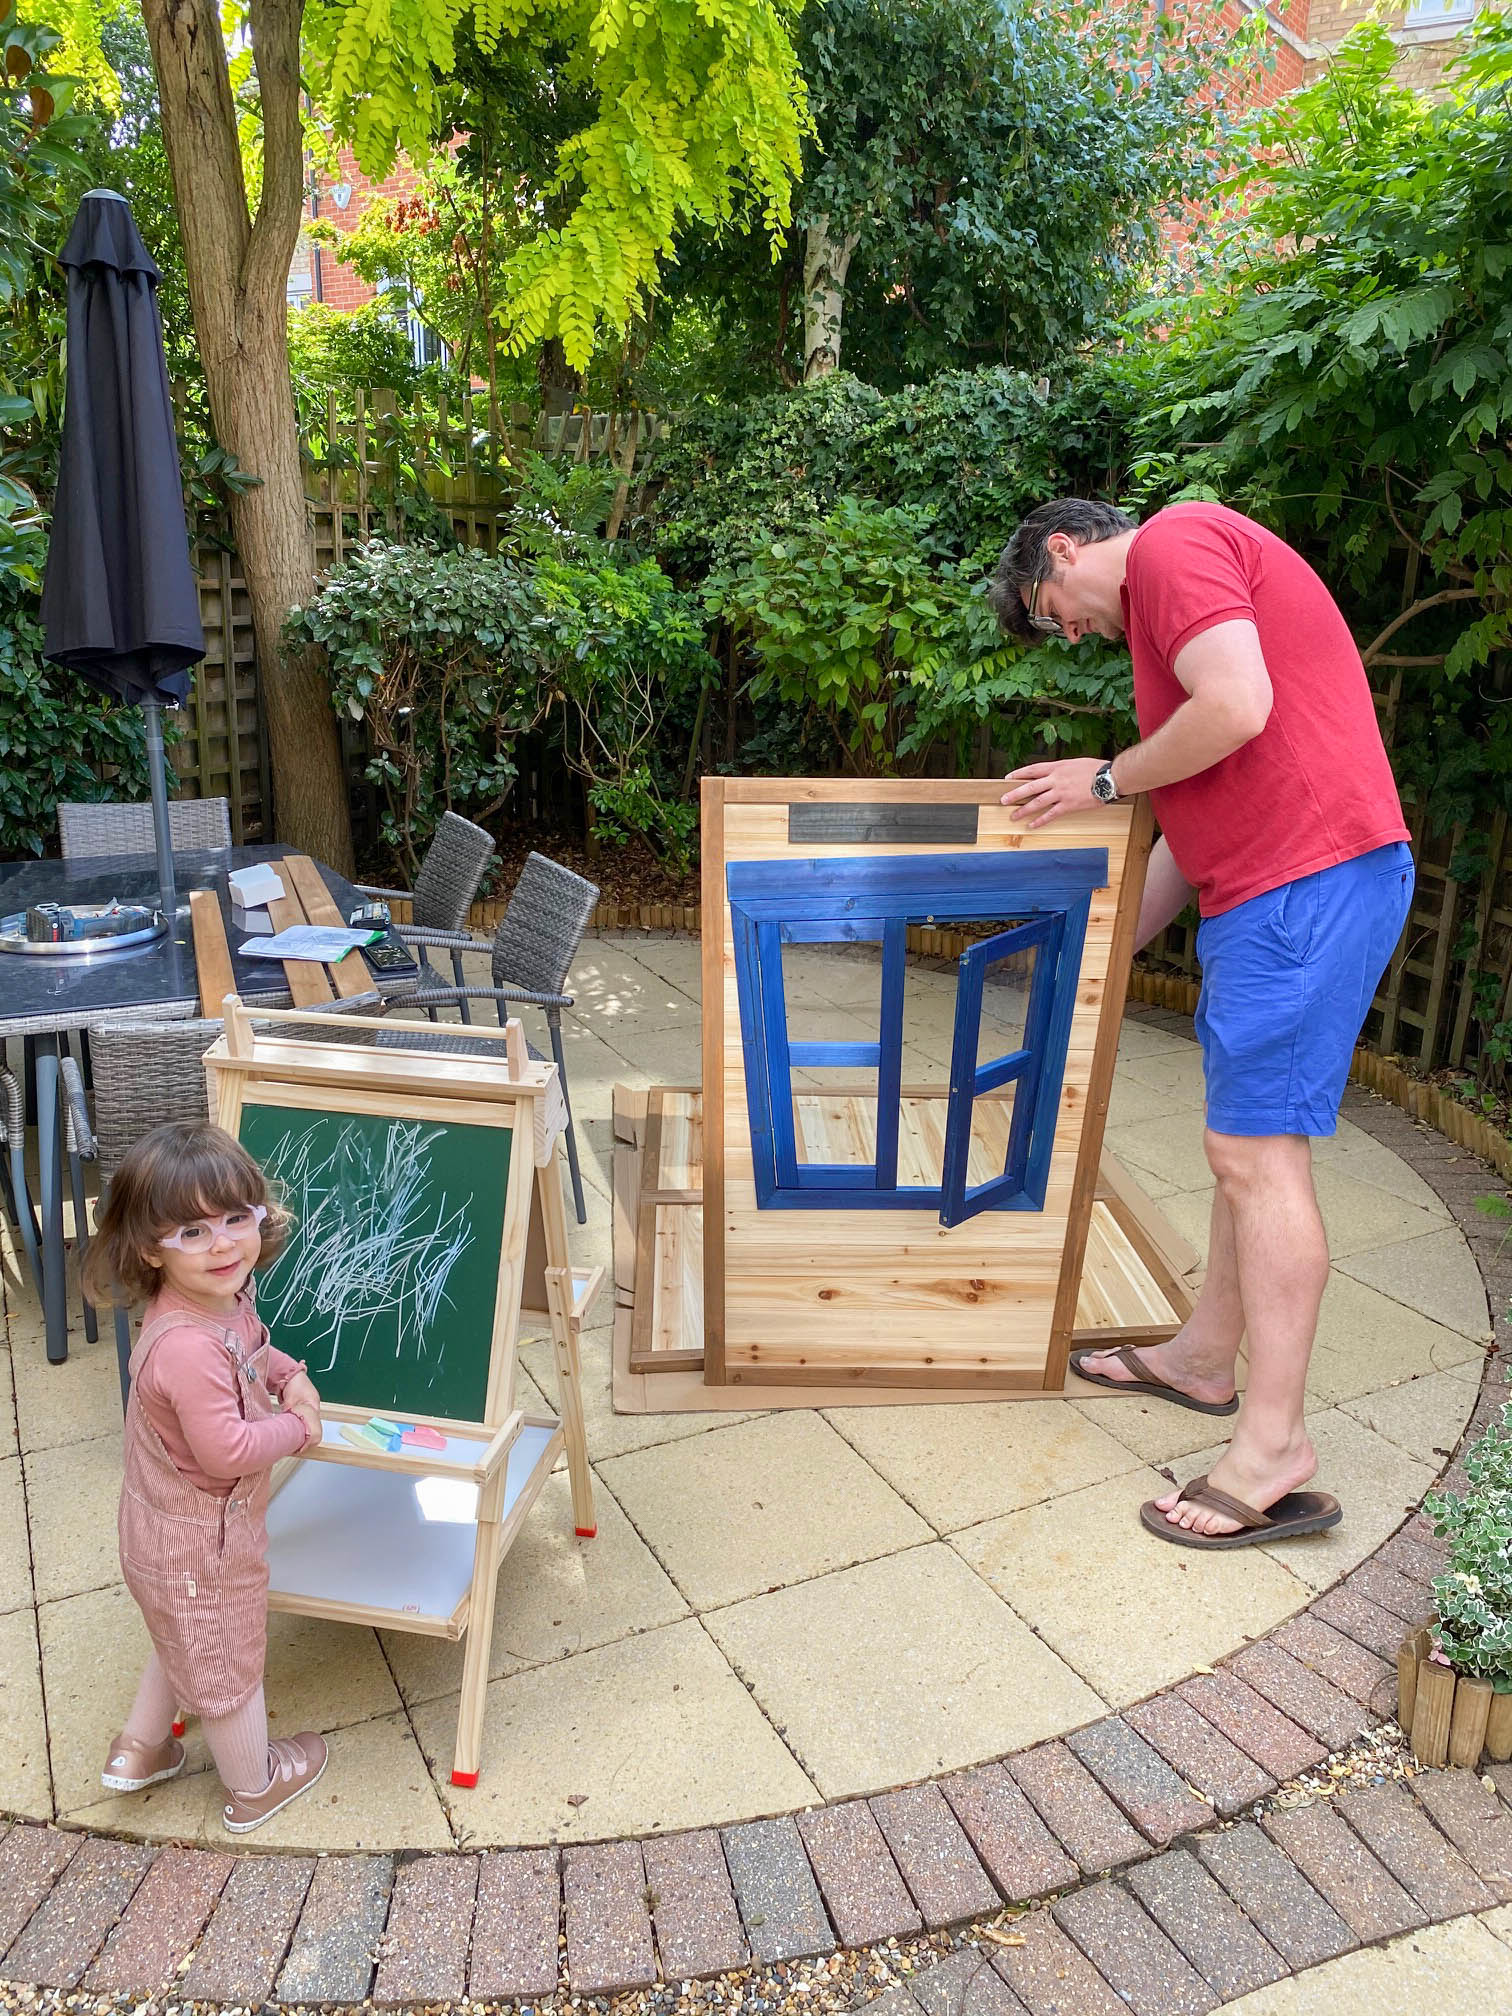
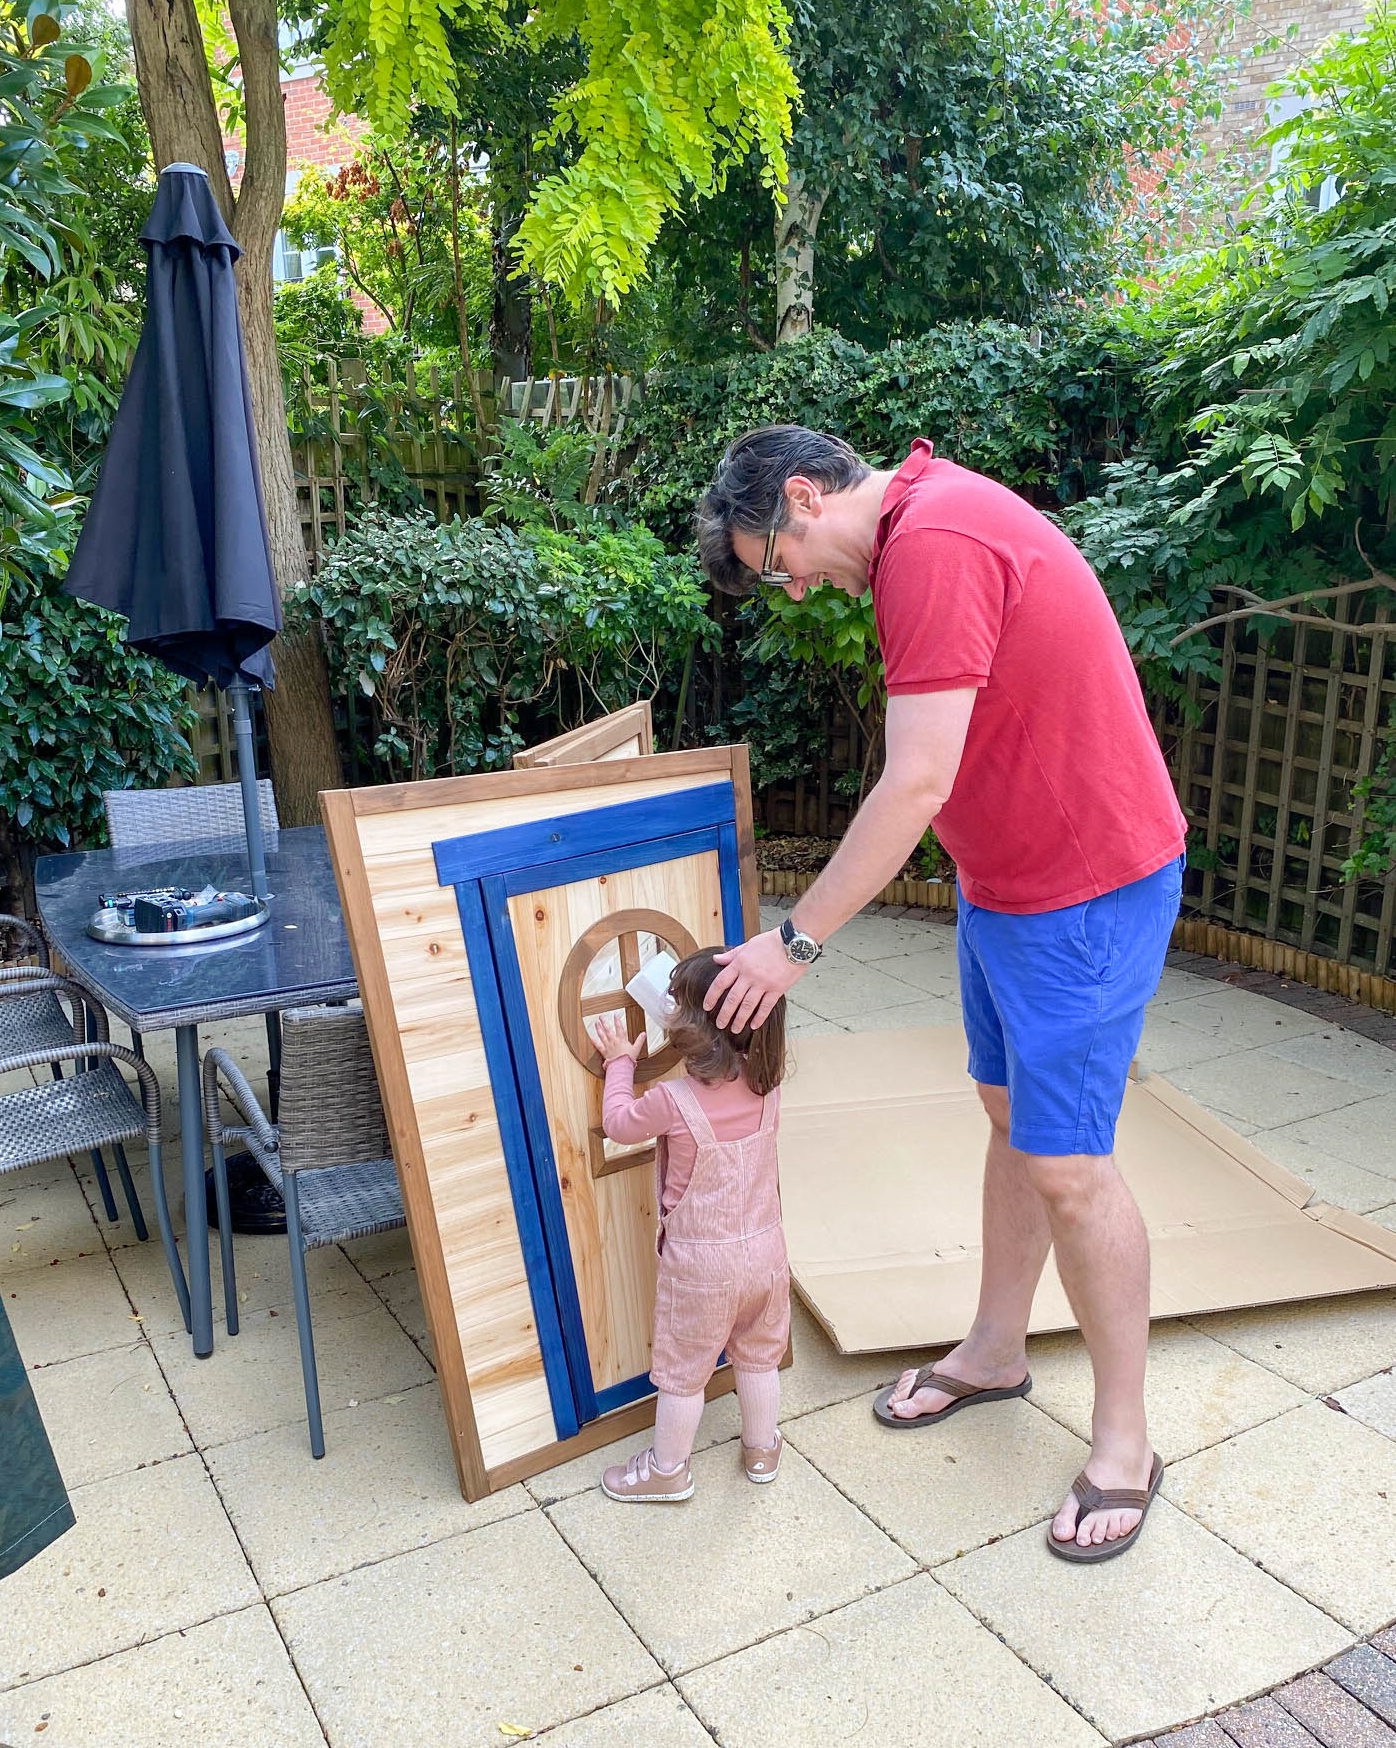
“Try not to disturb daddy too much, Clara!” “OK, I will just draw the instructions for him to make everything easier then!”
The Dynamic Duo!
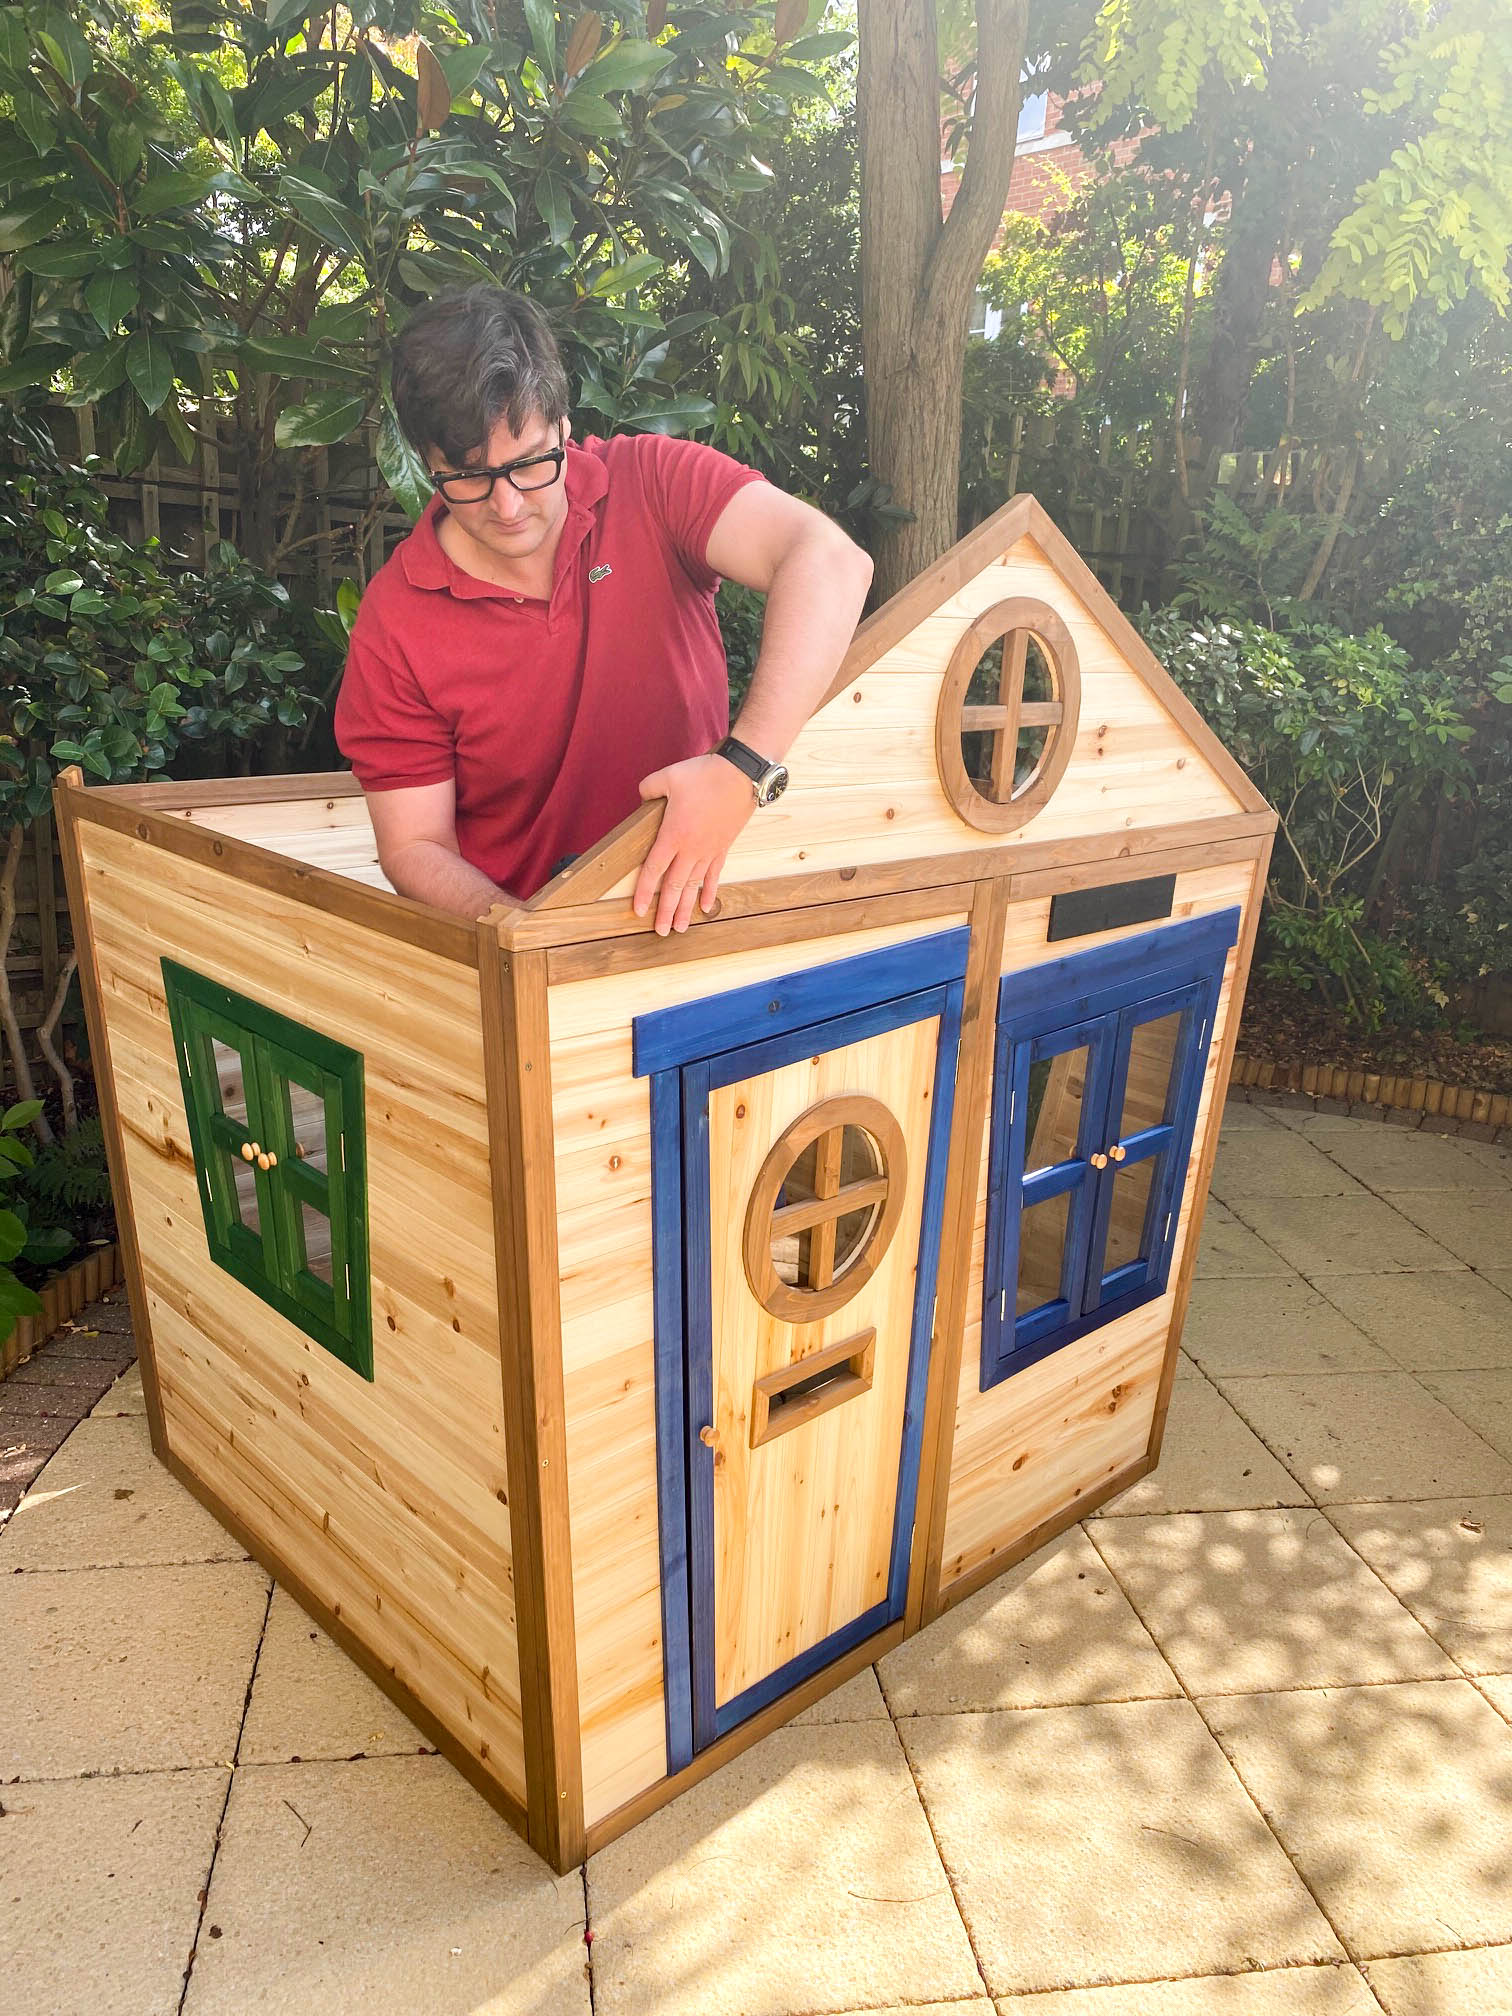
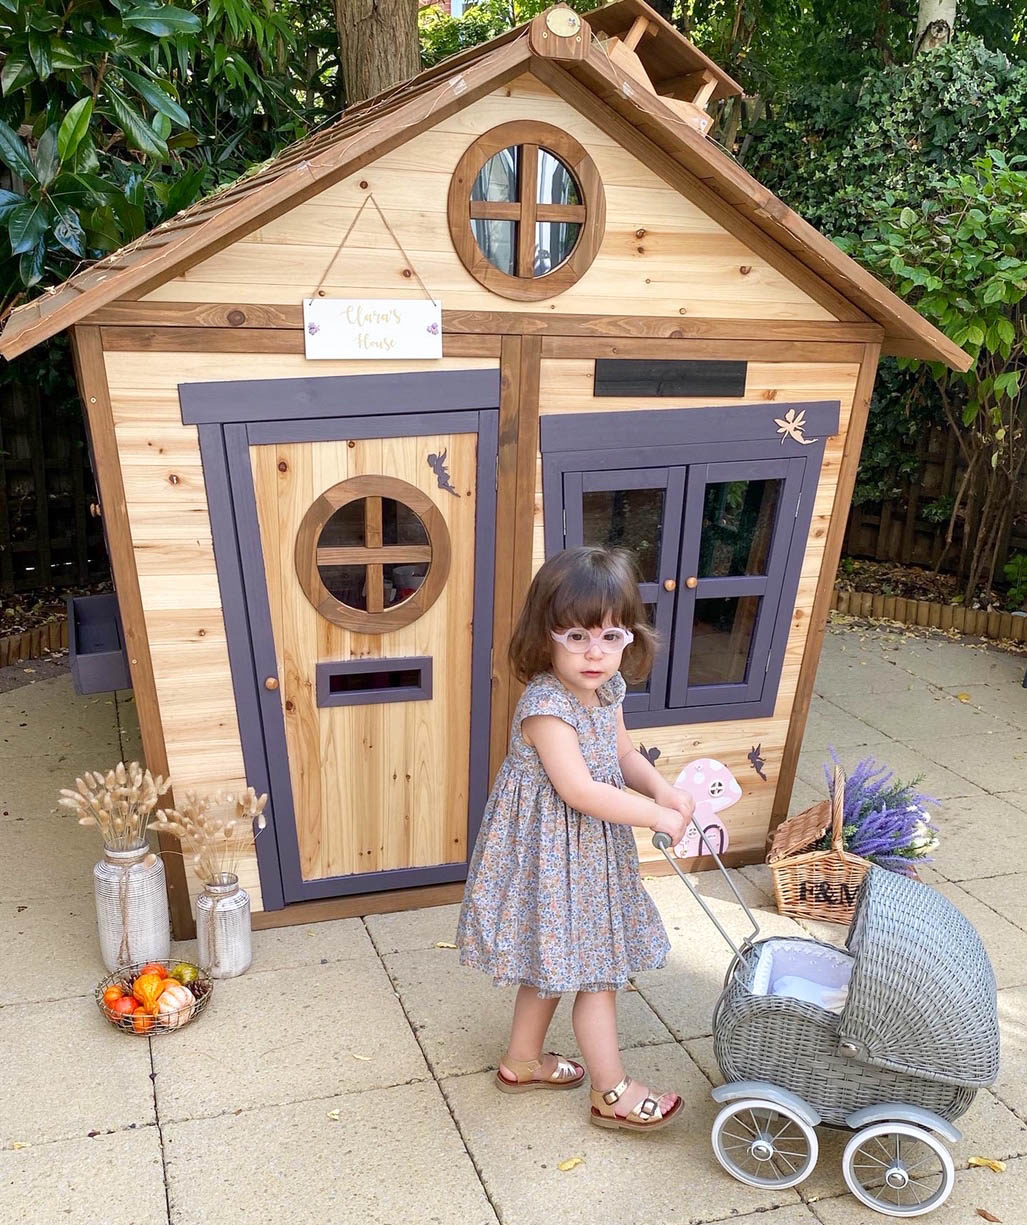
Bonus-info: The Redwood Mansion Playhouse is a large playhouse and perfect for older and younger children. There is a front door and two windows, a chalkboard name plaque, a planter tray and a letterbox! The front panel and both side panels include opening windows with magnetic safety catches. (All parts are made with thick Fir wood for strength and durability, No plywood or OSB is used)
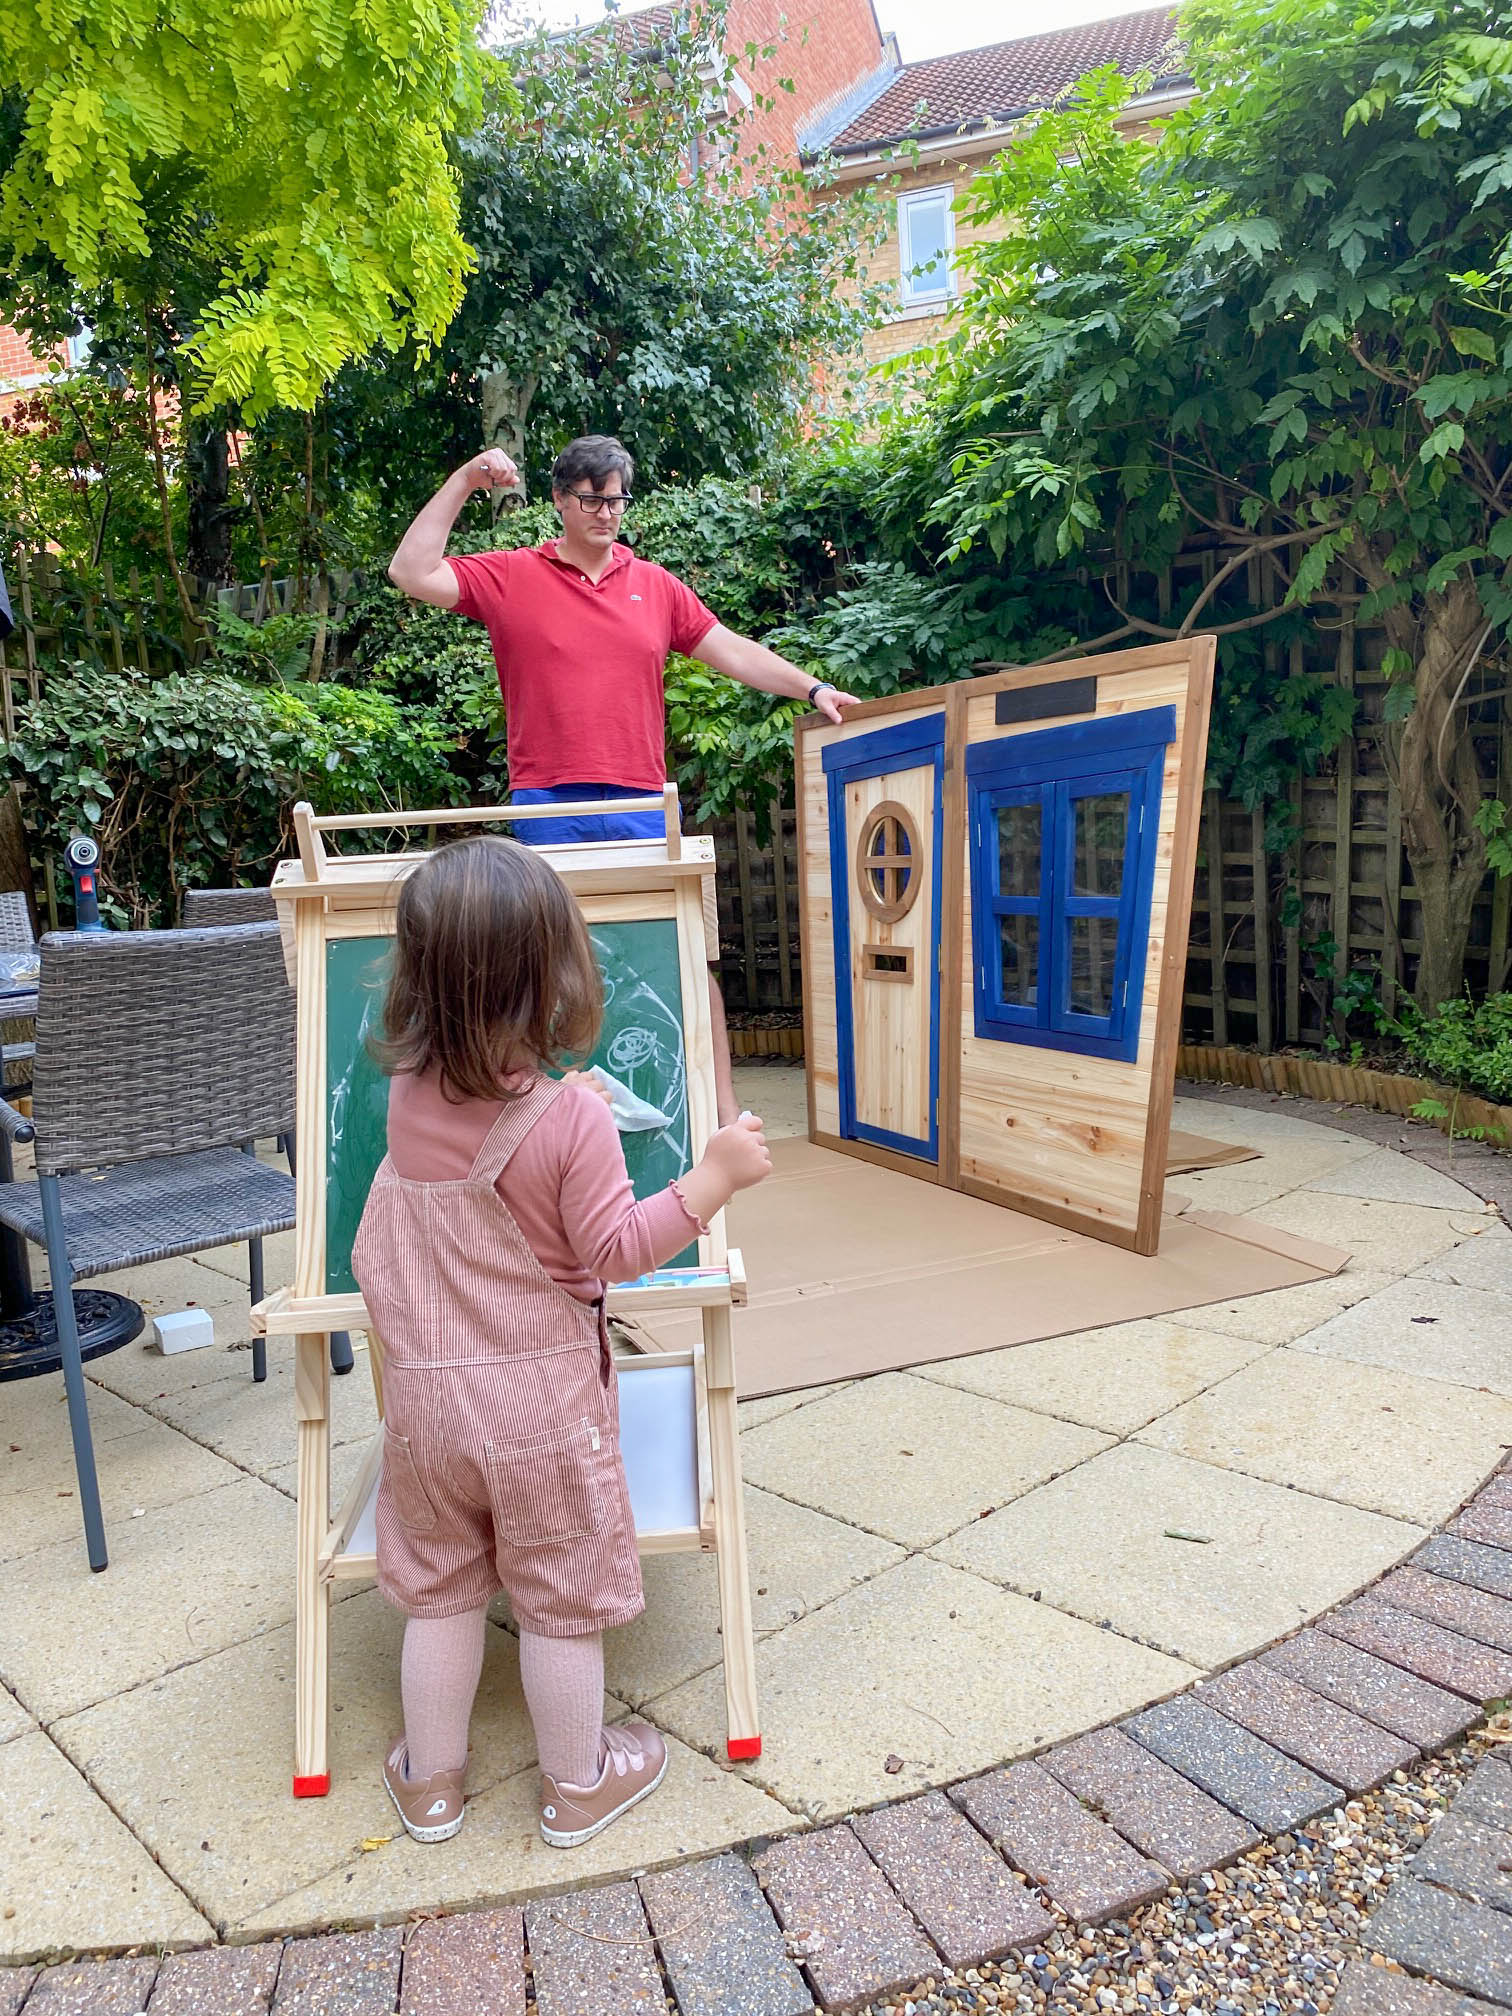
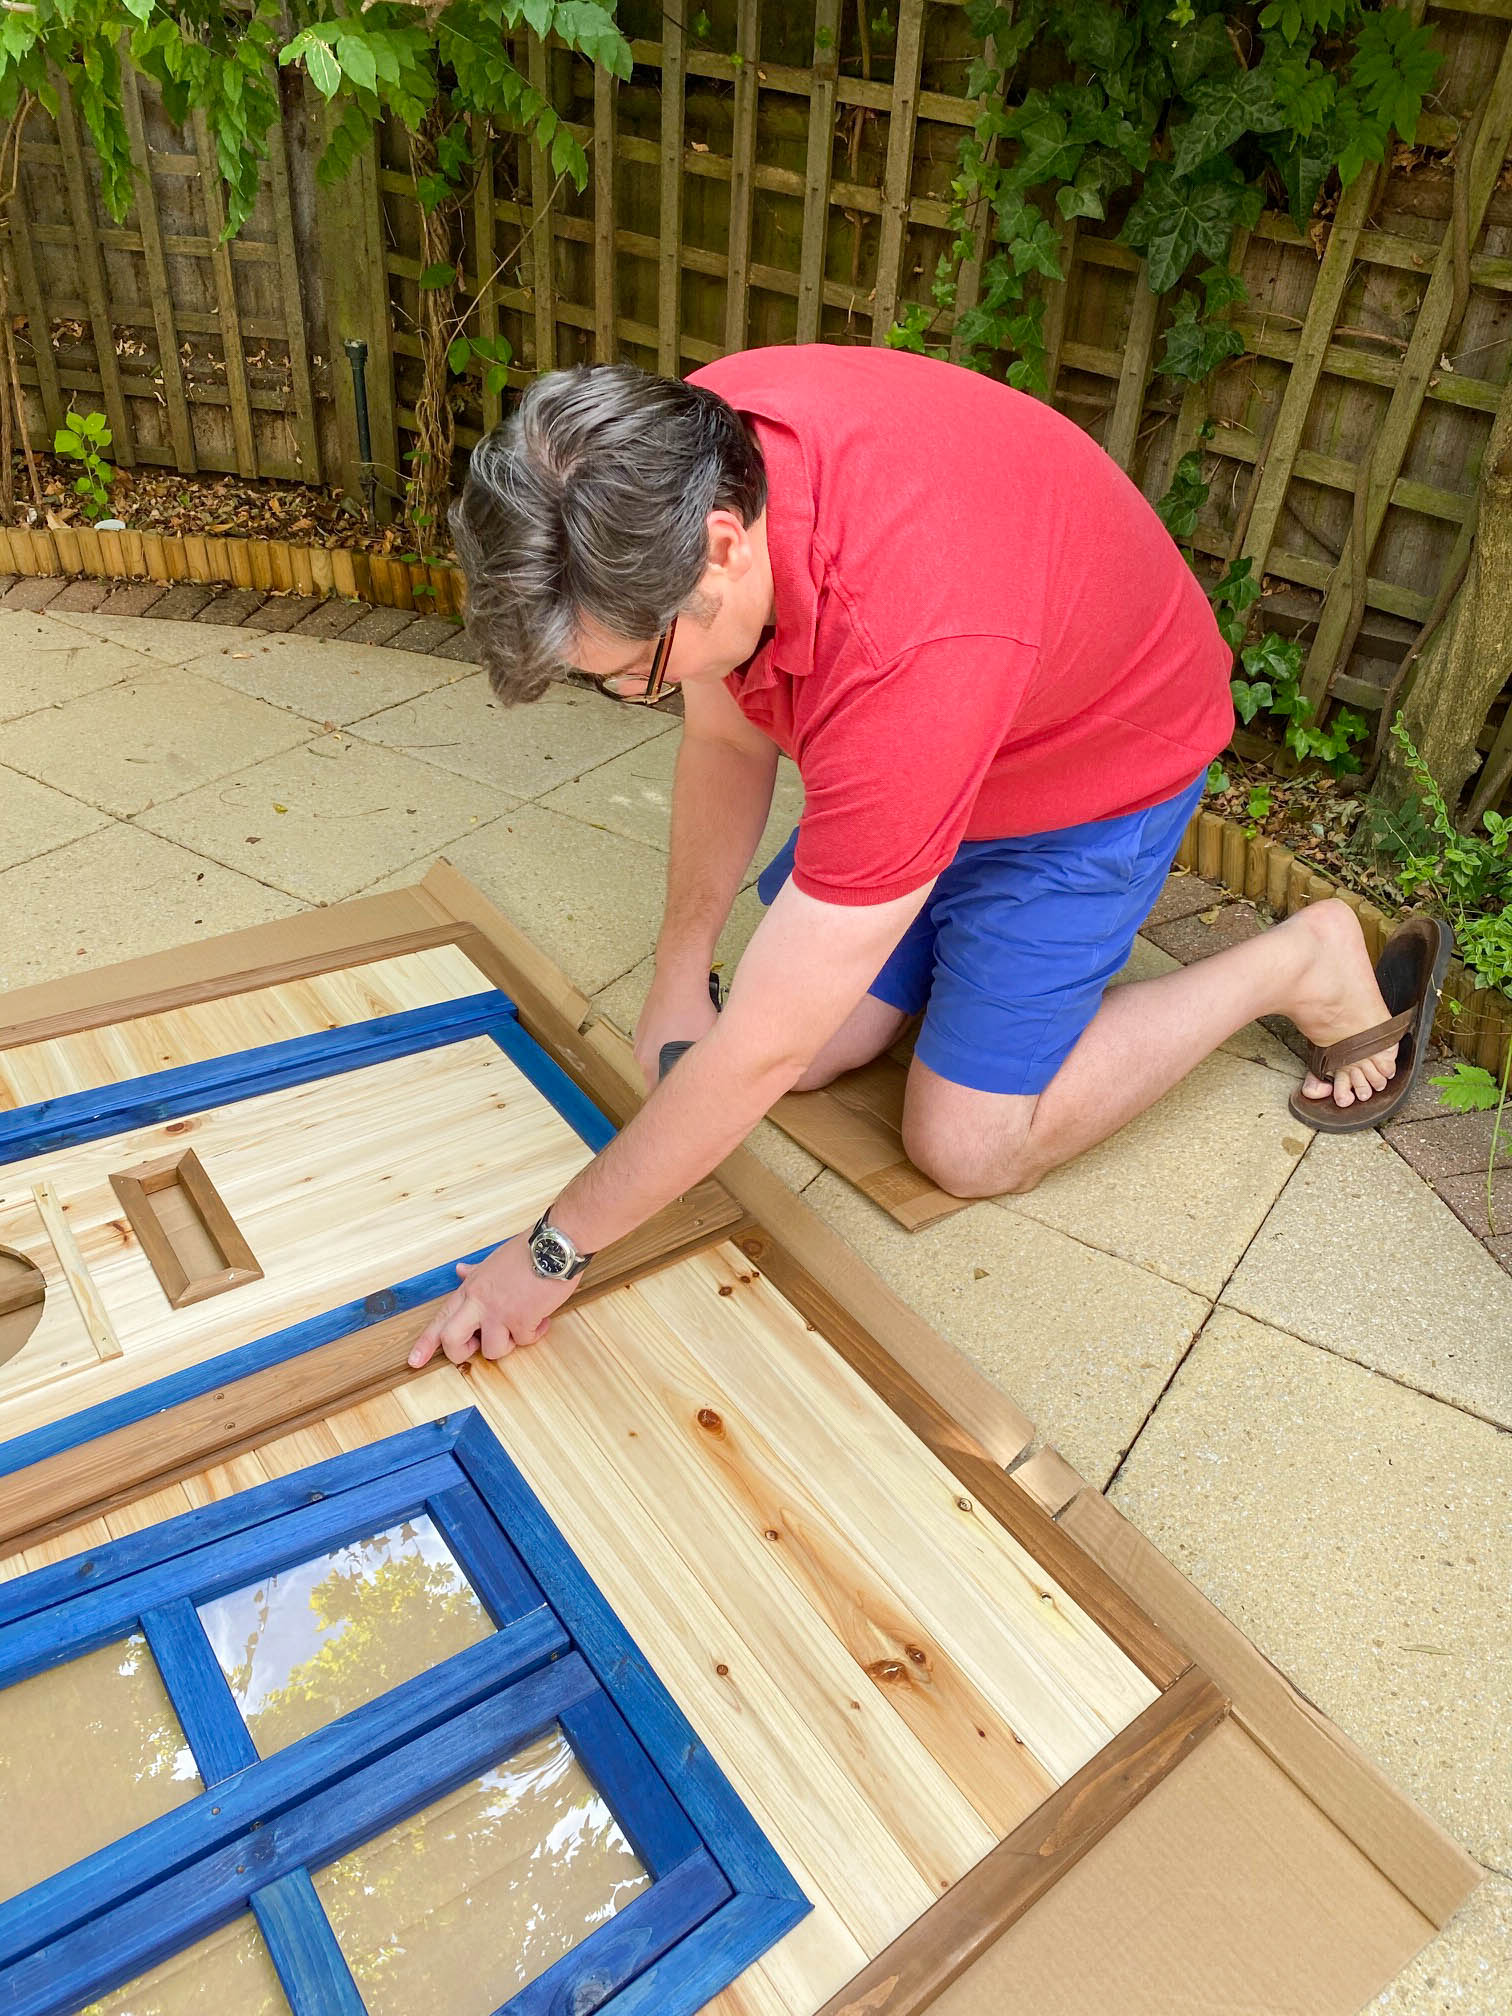
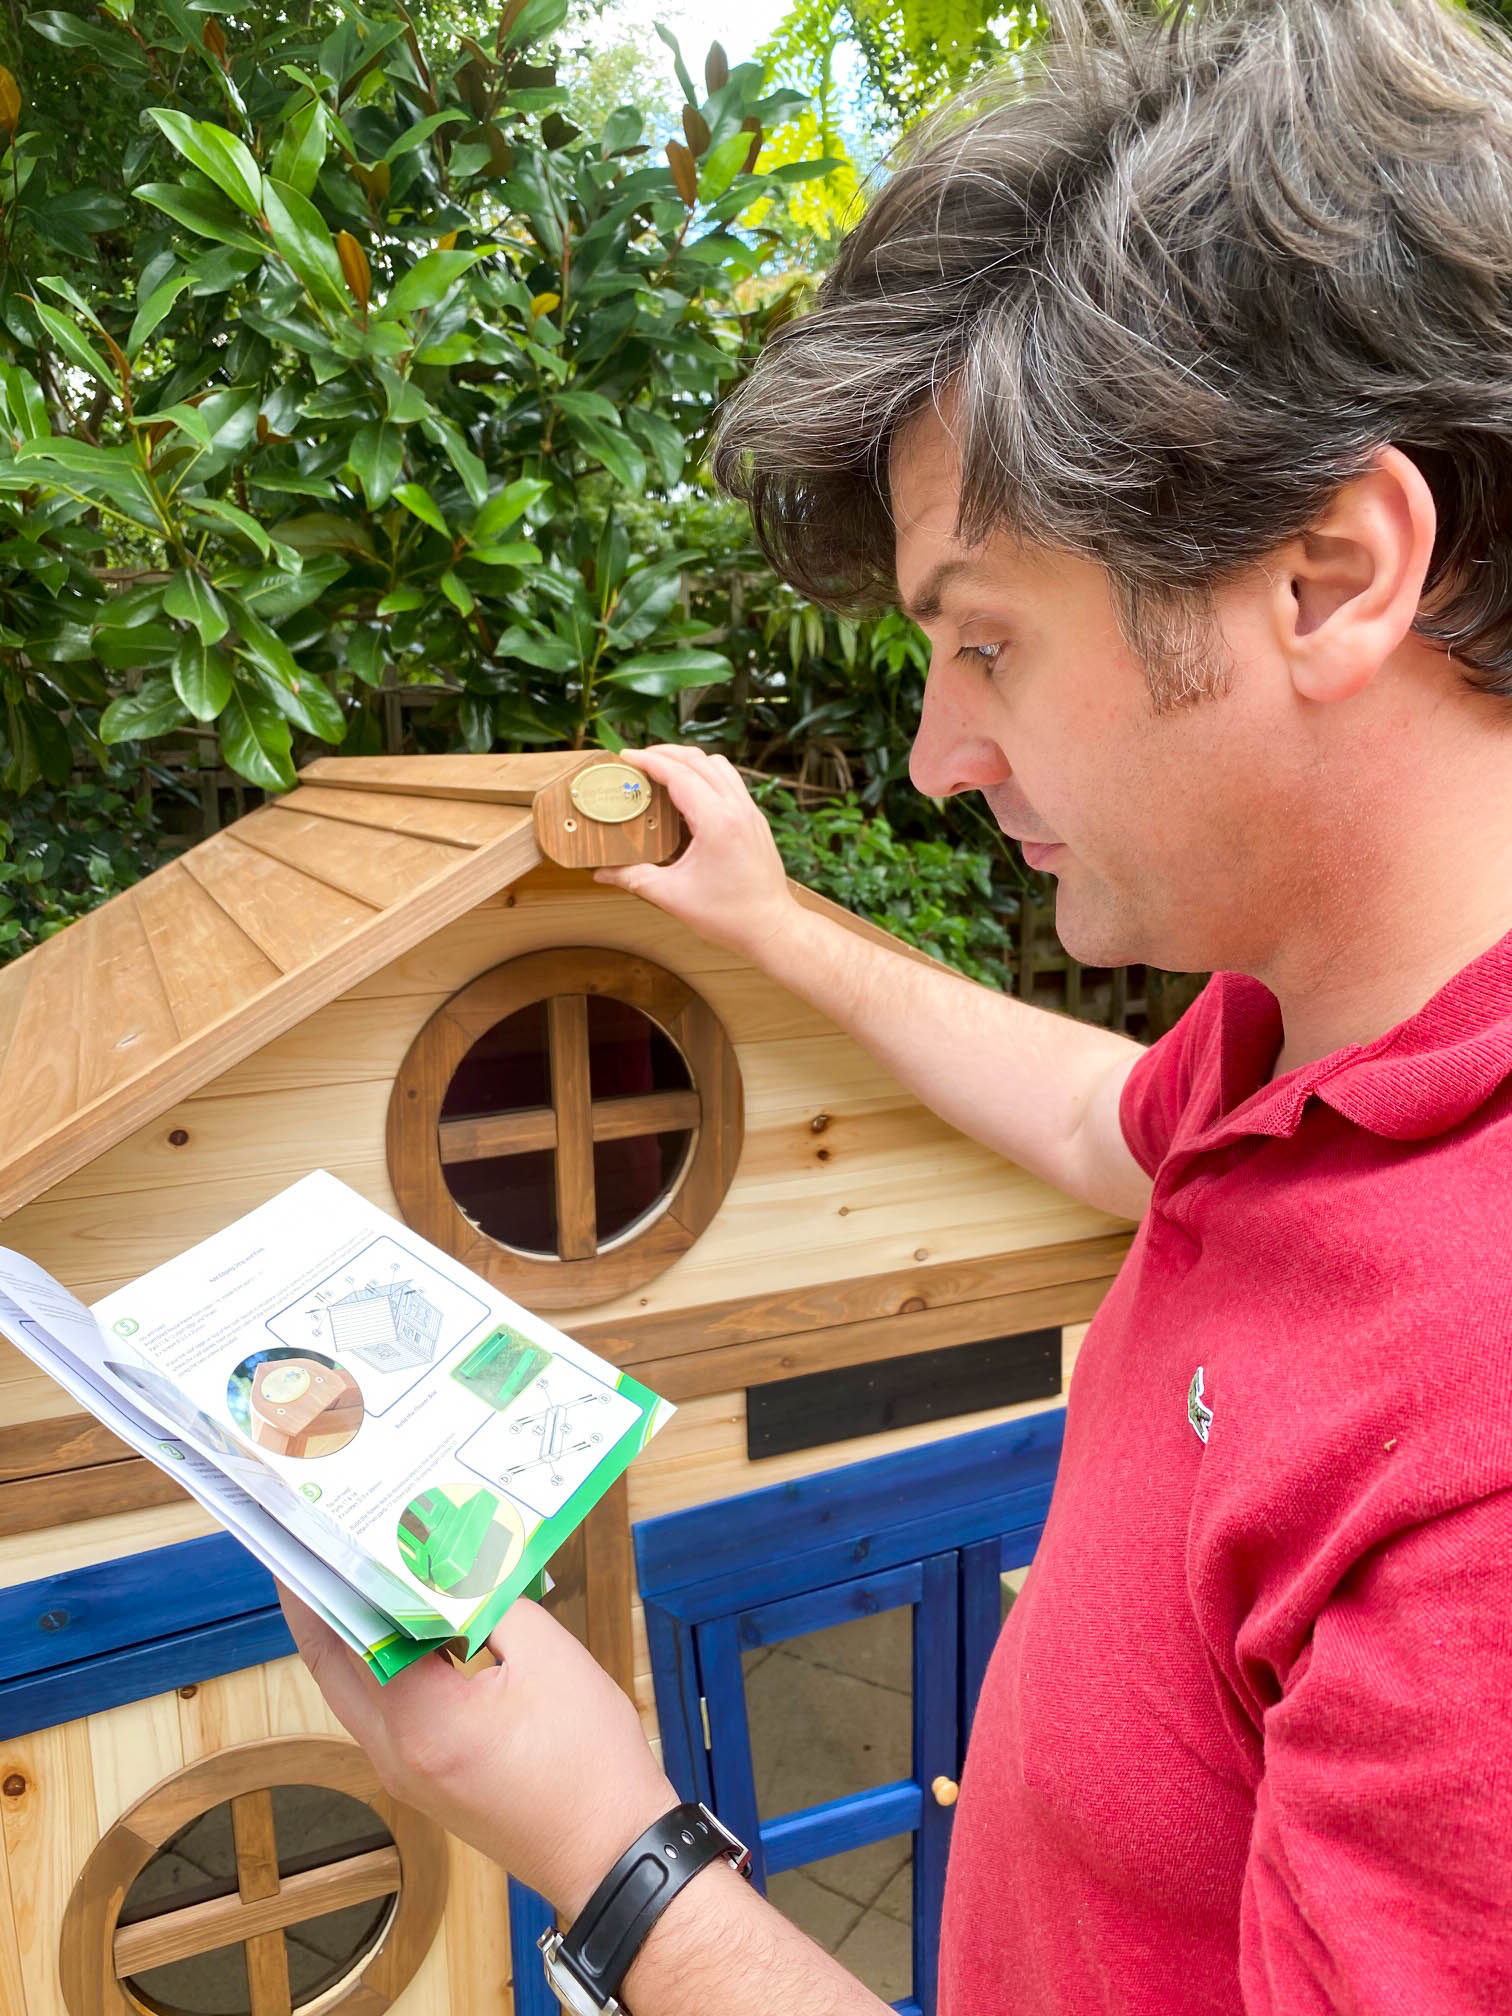
Almost done! Frenchie was enjoying assembling the playhouse – and he spent around 2 hours doing it
Bonus-info: The wood is painted with colourful wood stain which reaches deep into the wood for long lasting vibrance, and the windows and door are fixed into the panels (as well as the frames and hinges), so assembly is very simple! You simply fix the wall and roof panels together using predrilled holes and the screws which come in labelled packs
Redwood Mansion Playhouse from Big Game Hunters… Isn’t it a beauty? But wait… There is more to come!
A picture is worth a thousand words! I can still remember Clara’s face when she woke up from her nap and saw the playhouse all finished and ready for her to move in!
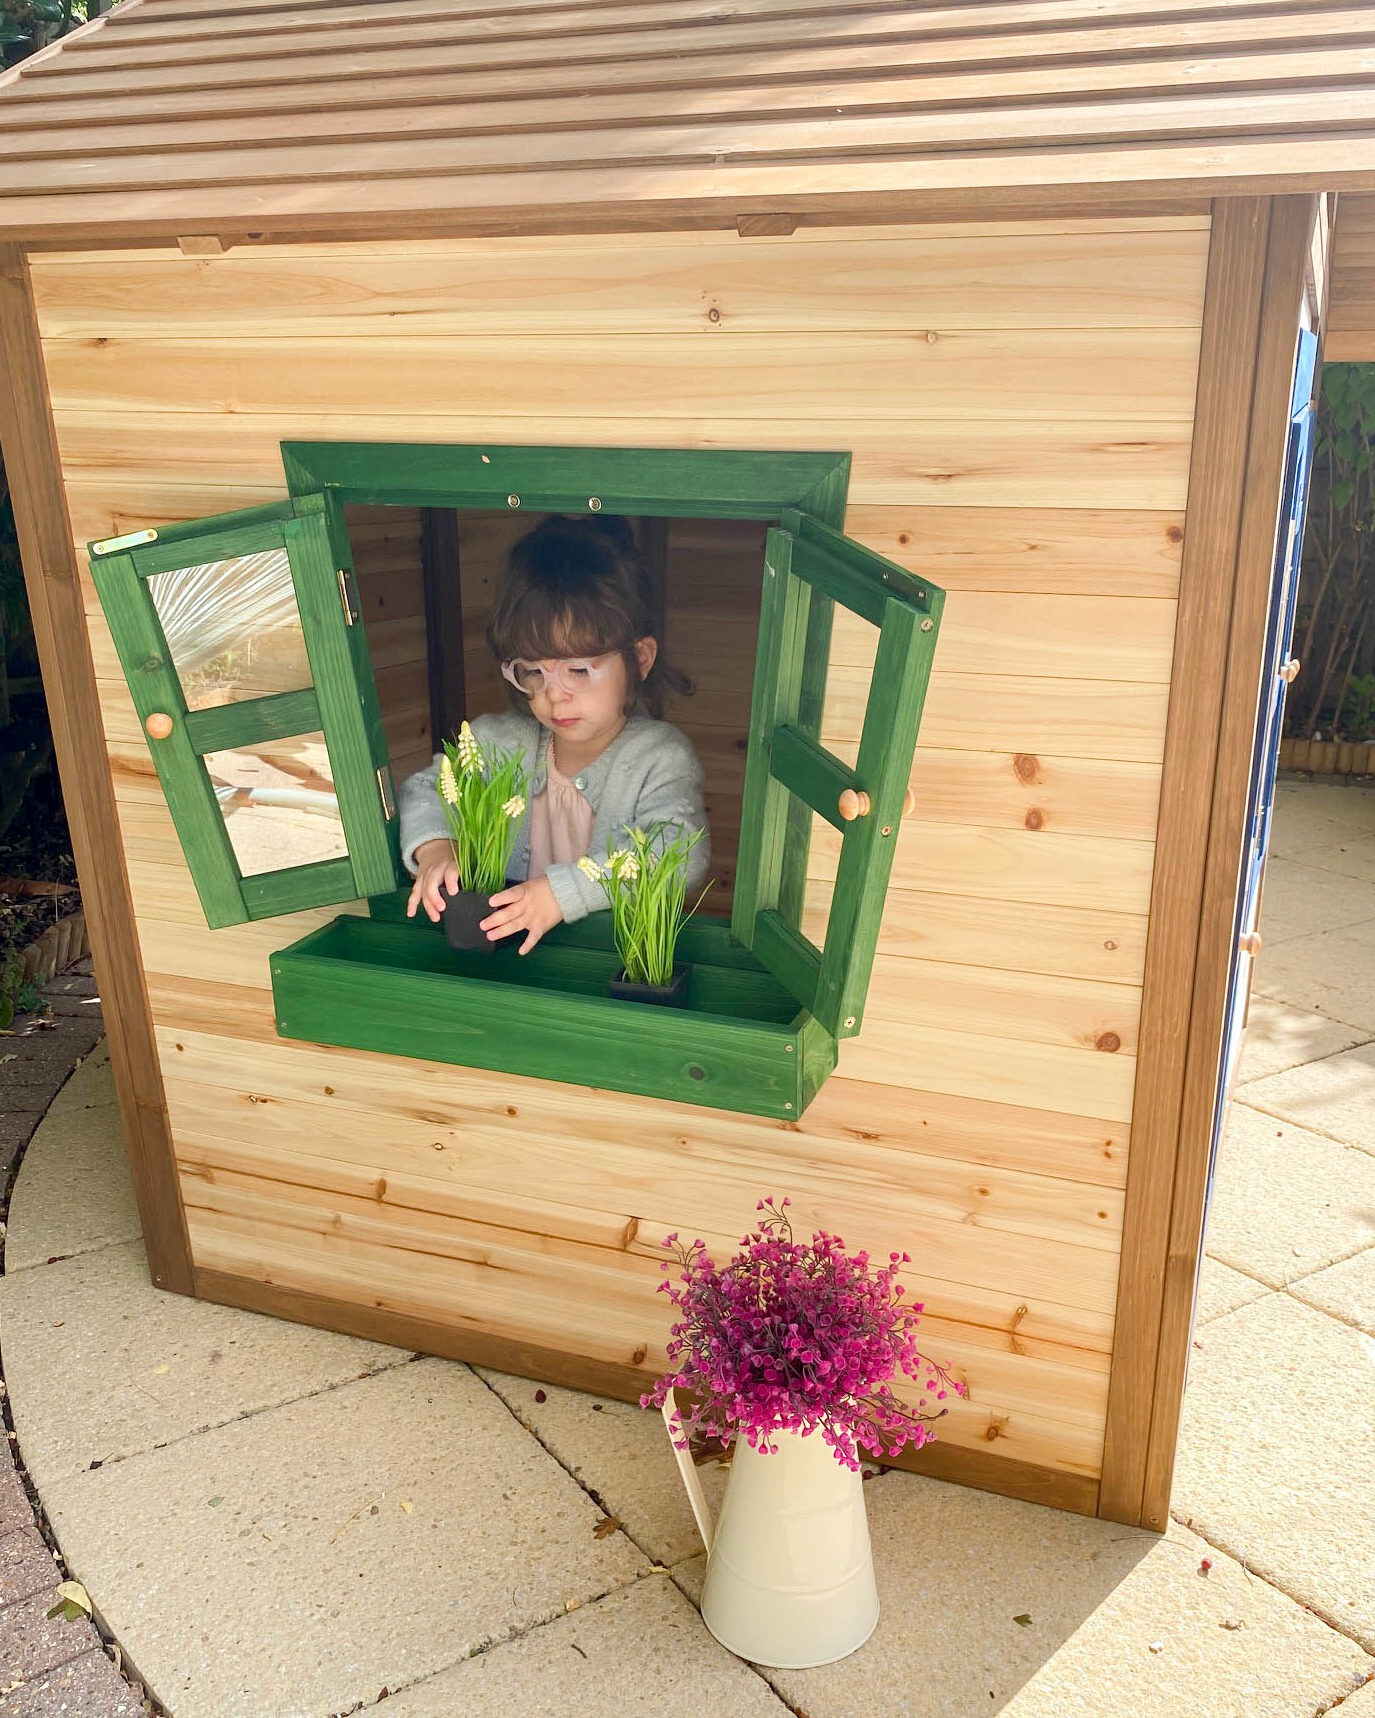
All we needed to do was attaching the planter tray (Clara was making sure, we did it correctly!)
– and it was time to move in!
Clara fell in love with her new “home”…
If you ask me, I think the Redwood Wooden Playhouse is super lovely the way it is, but Clara is a “girly” girl (and so is her mother), so I decided to try to make it bit more after “our taste”
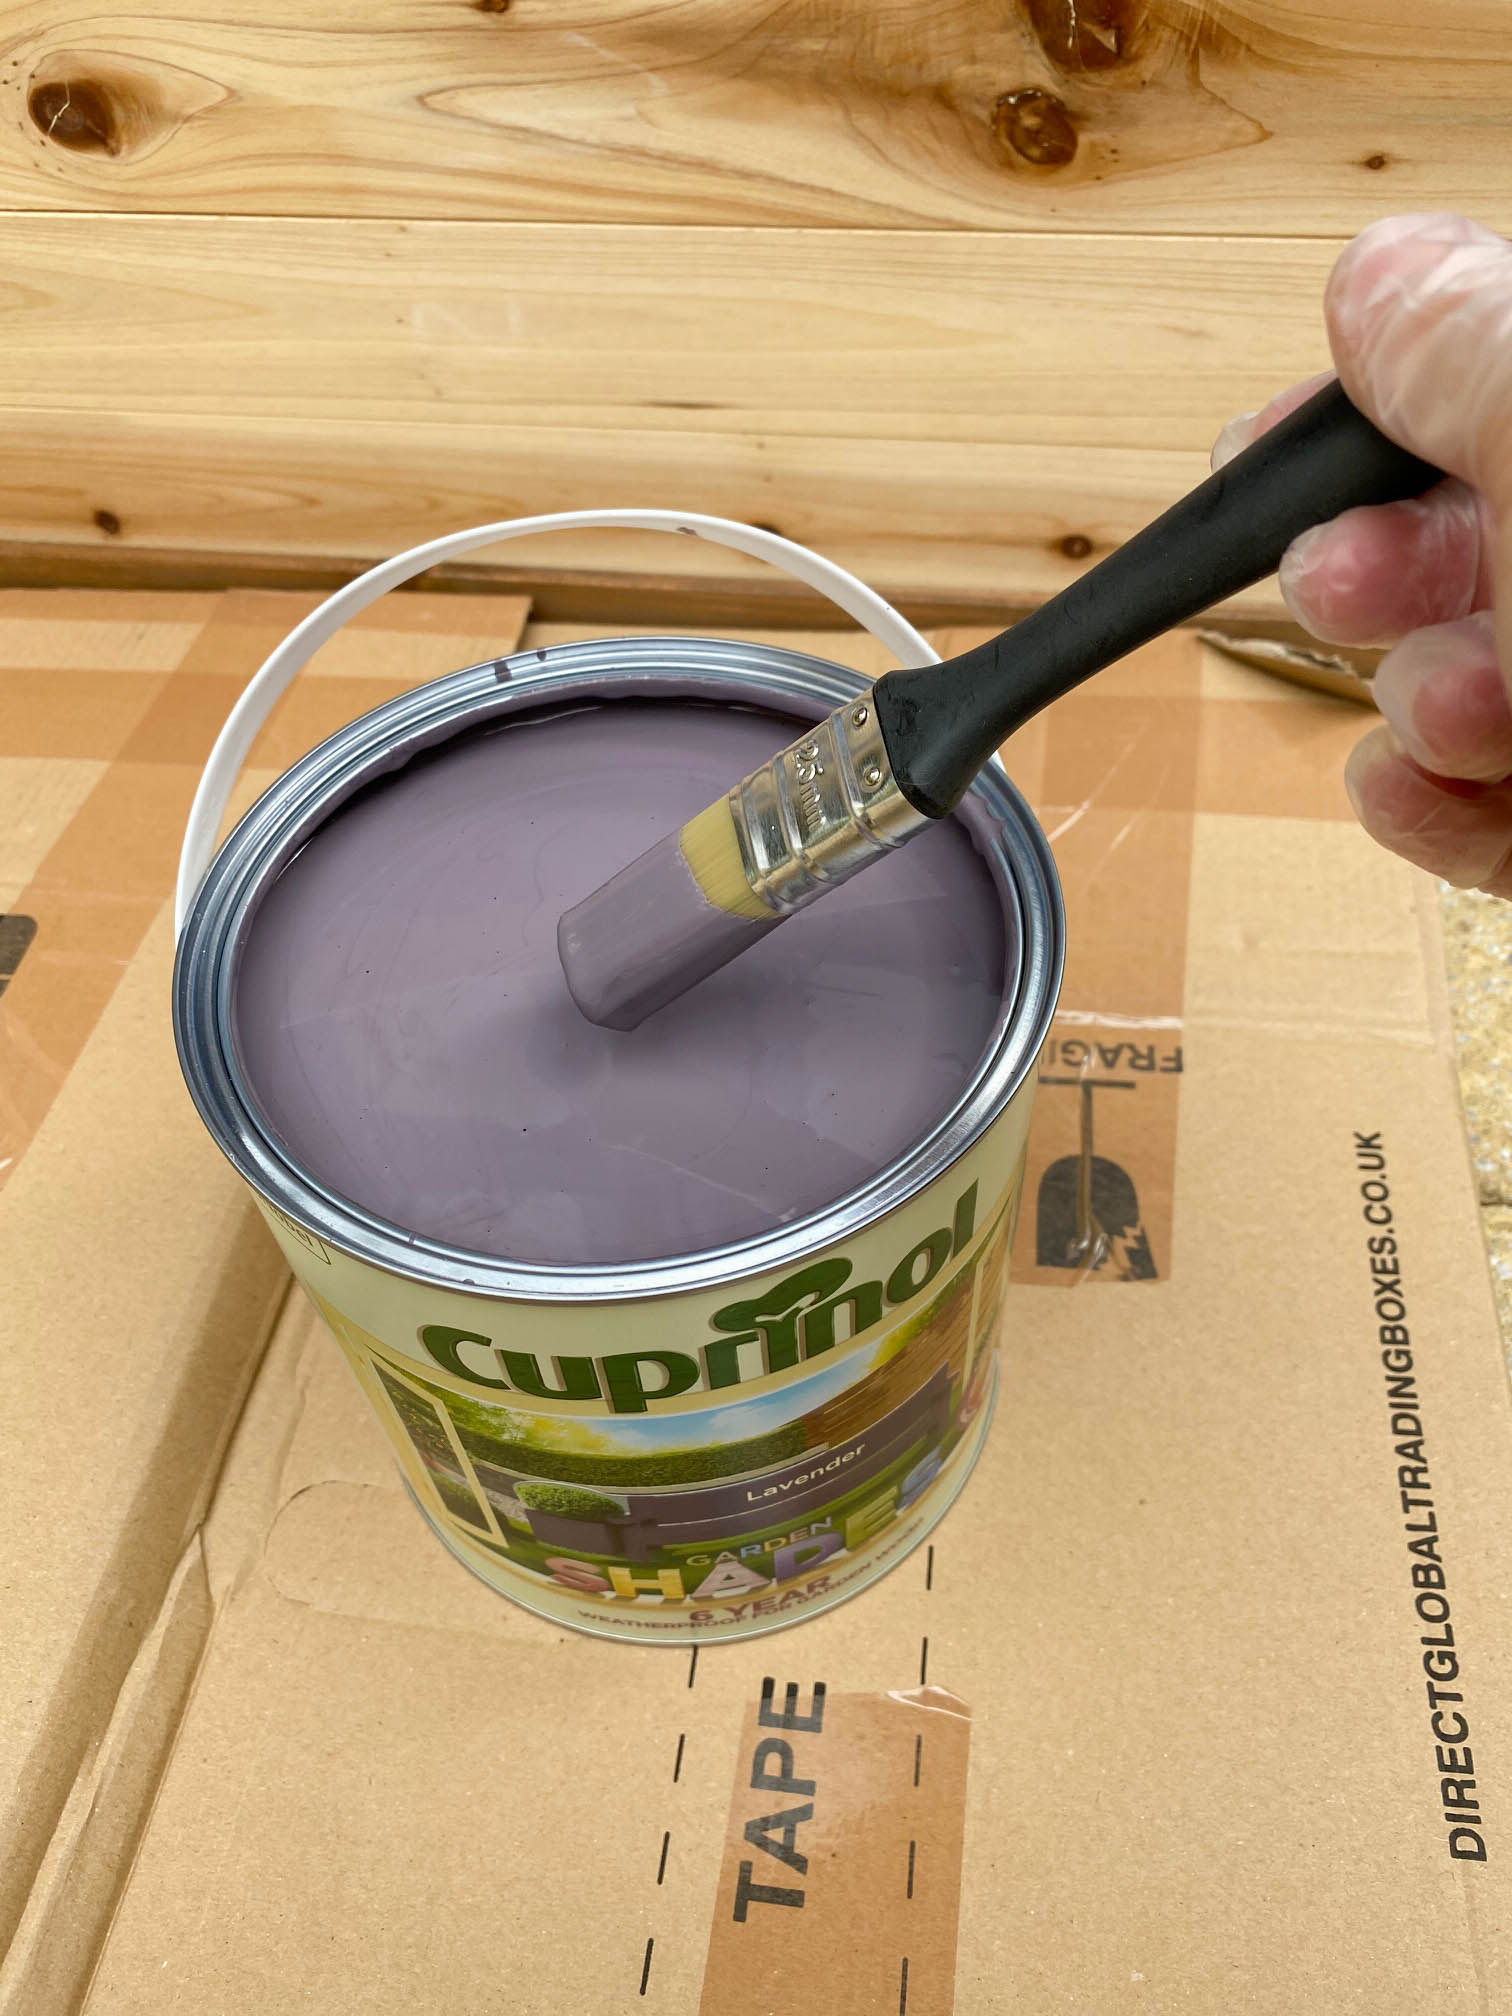
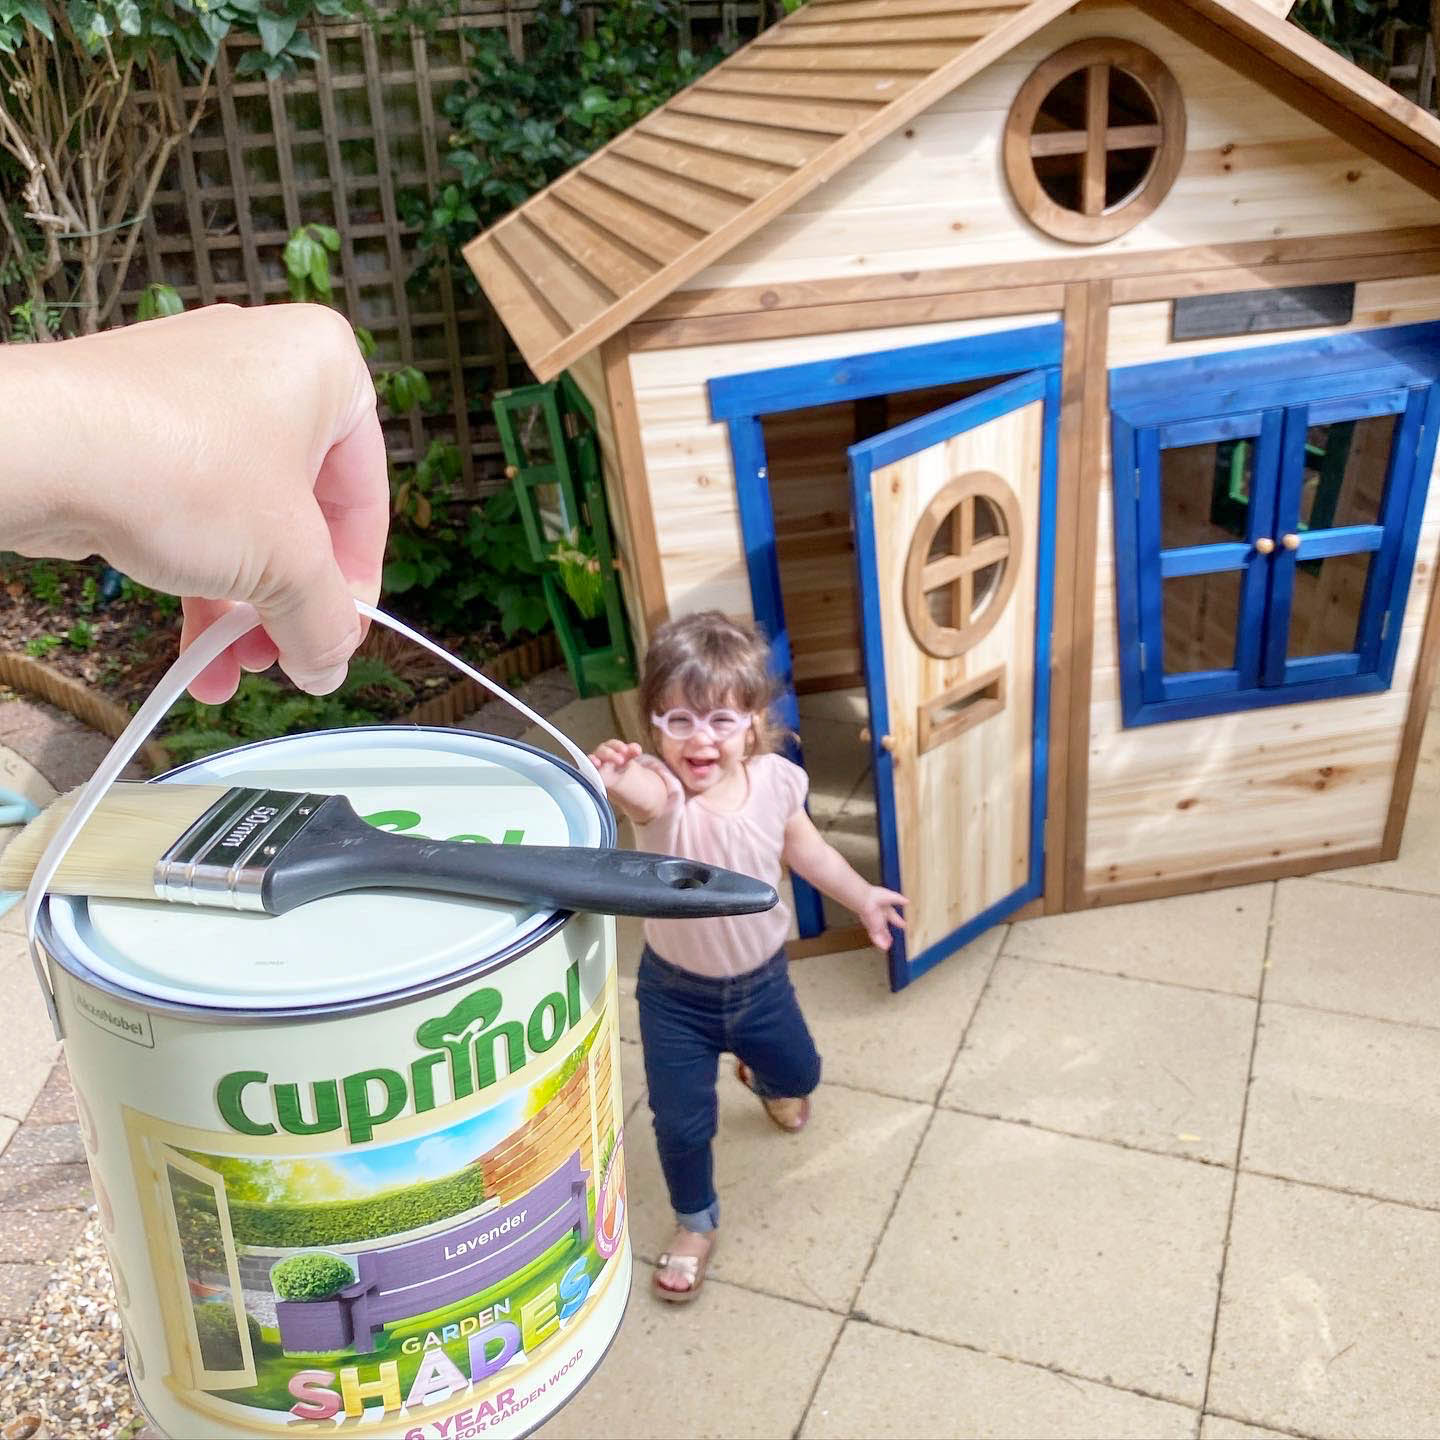
The lovely team at Big Game Hunters advised me to buy Culprinol Garden Shades. There are so many gorgeous colours to choose from, but I ended up choosing lavender, as I feel this colour goes really well with all seasons
Tip: Make sure your chosen colour states whether it is matte, satin or gloss to get your preferred finish. The paint tin needs to state that it’s for exterior wood. Some paints include weather-proofing properties, particularly gloss paints which repel water, but most will require a weatherproof coat or preserver to keep the wood healthy and reapply each year or according to the paint instructions.
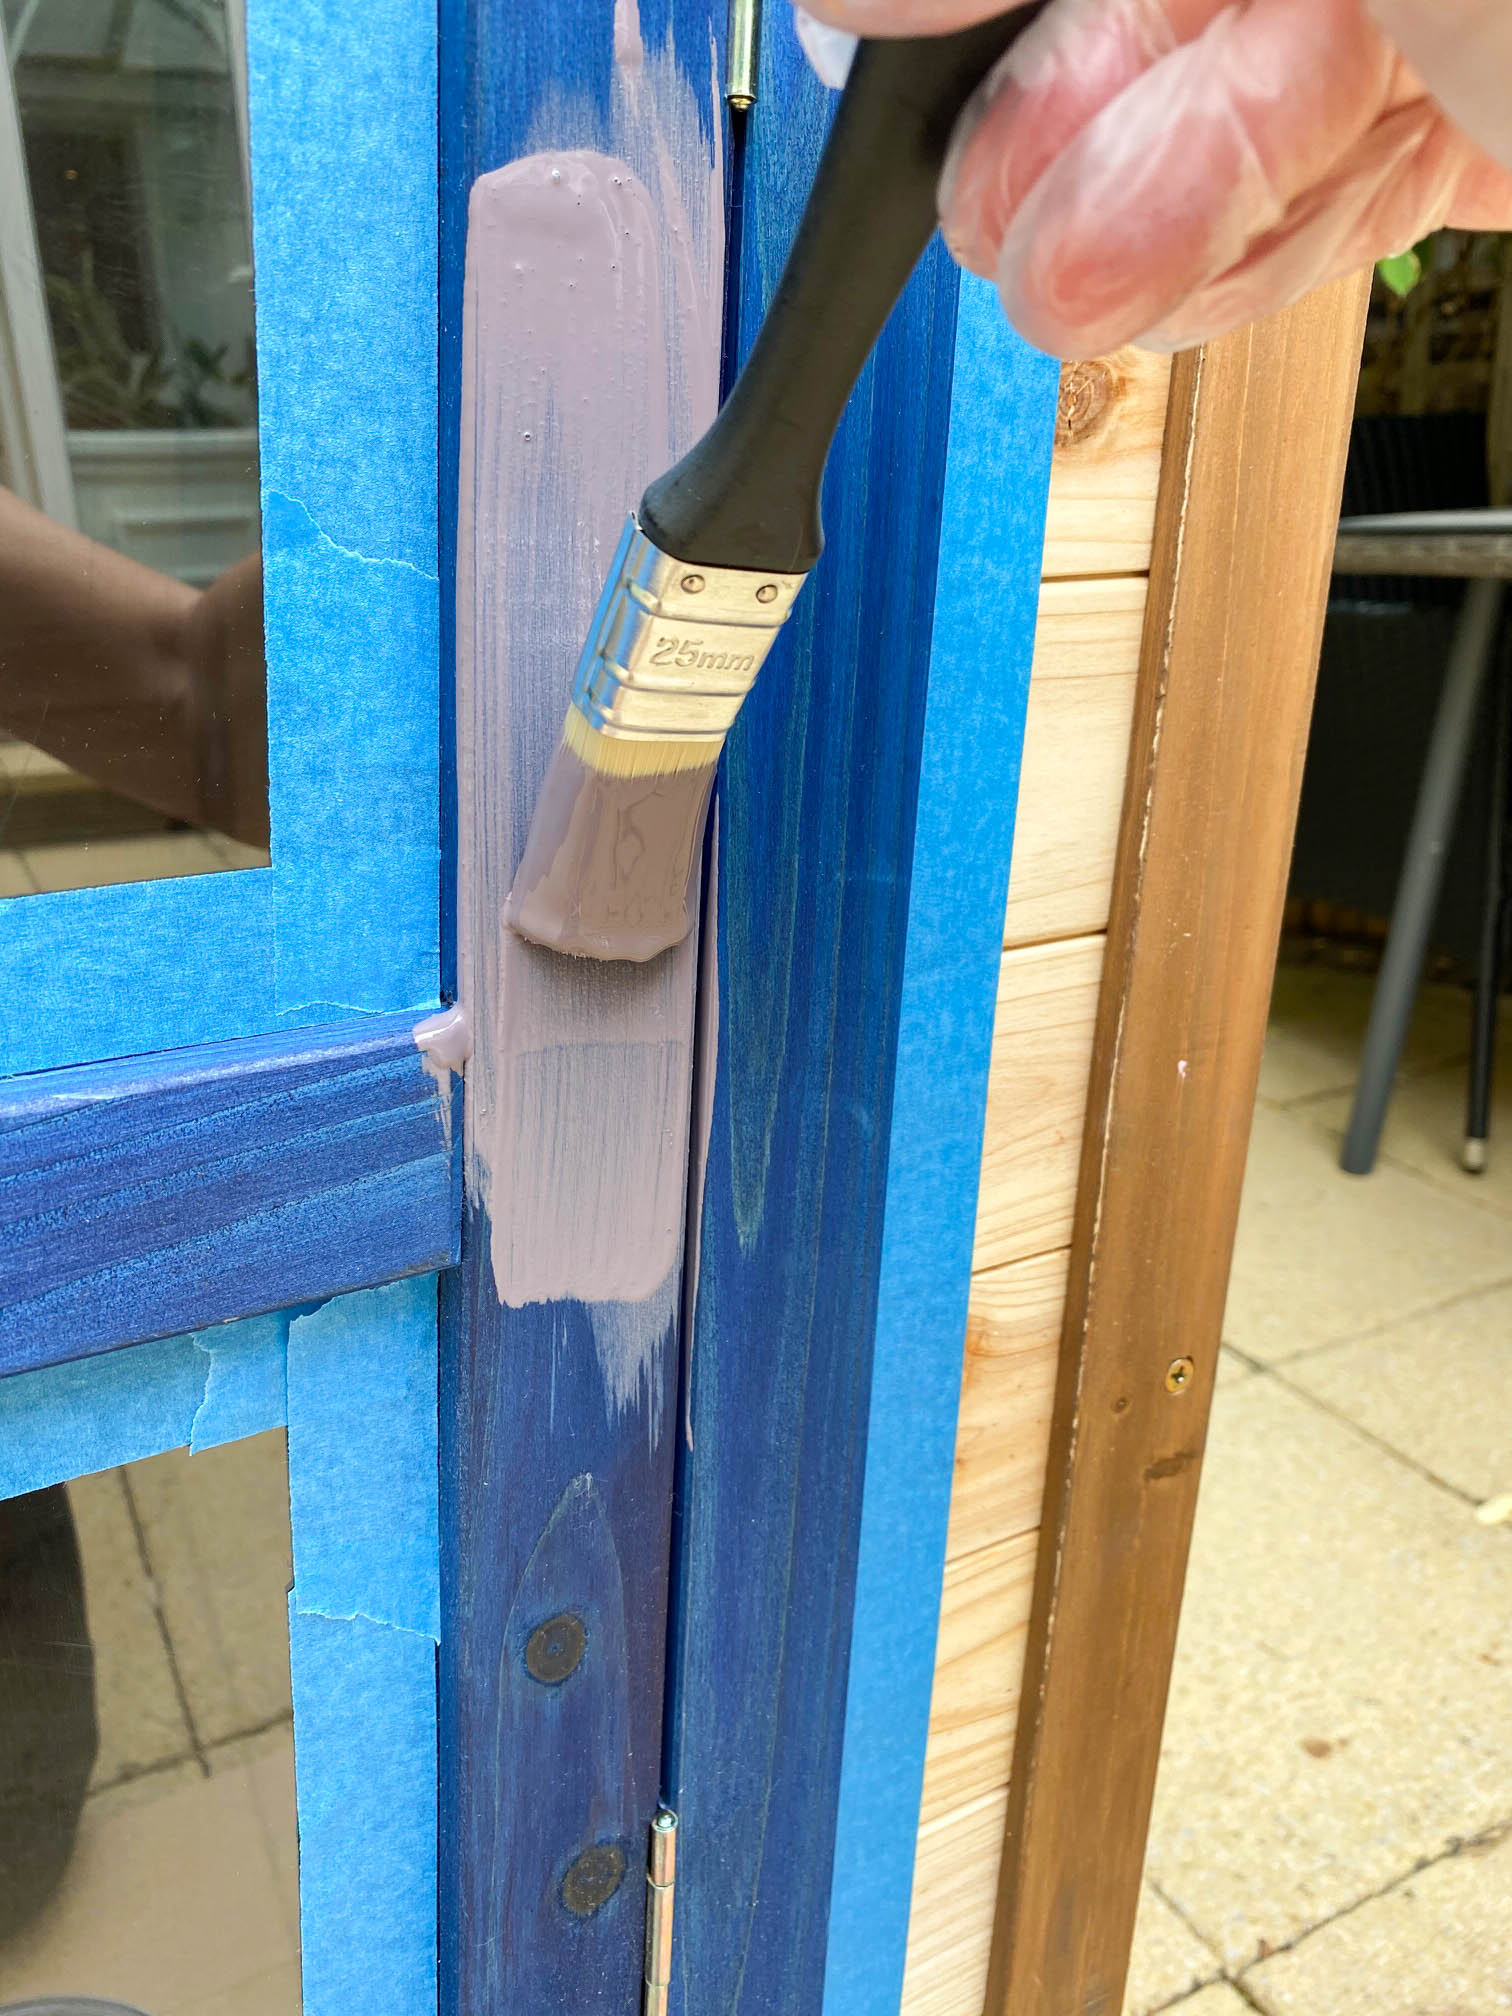
Very important! Make sure to use a lot of masking tape to stop any splashing or wobbly lines
Tip: Give the wood a quick brush down to remove any dust or dirt that may interfere with the paint. A brush from a dustpan set is an ideal size for quickness. If you’ve had the playhouse for a while, you might like to wipe the wood down with a damp cloth, but make sure it’s completely dried out before starting to paint.
(Most exterior wood paints don’t require a primer to be used first, but check the instructions on the tin before you begin. Most primers are oil-based so you’ll need White Spirit to clean your brush)
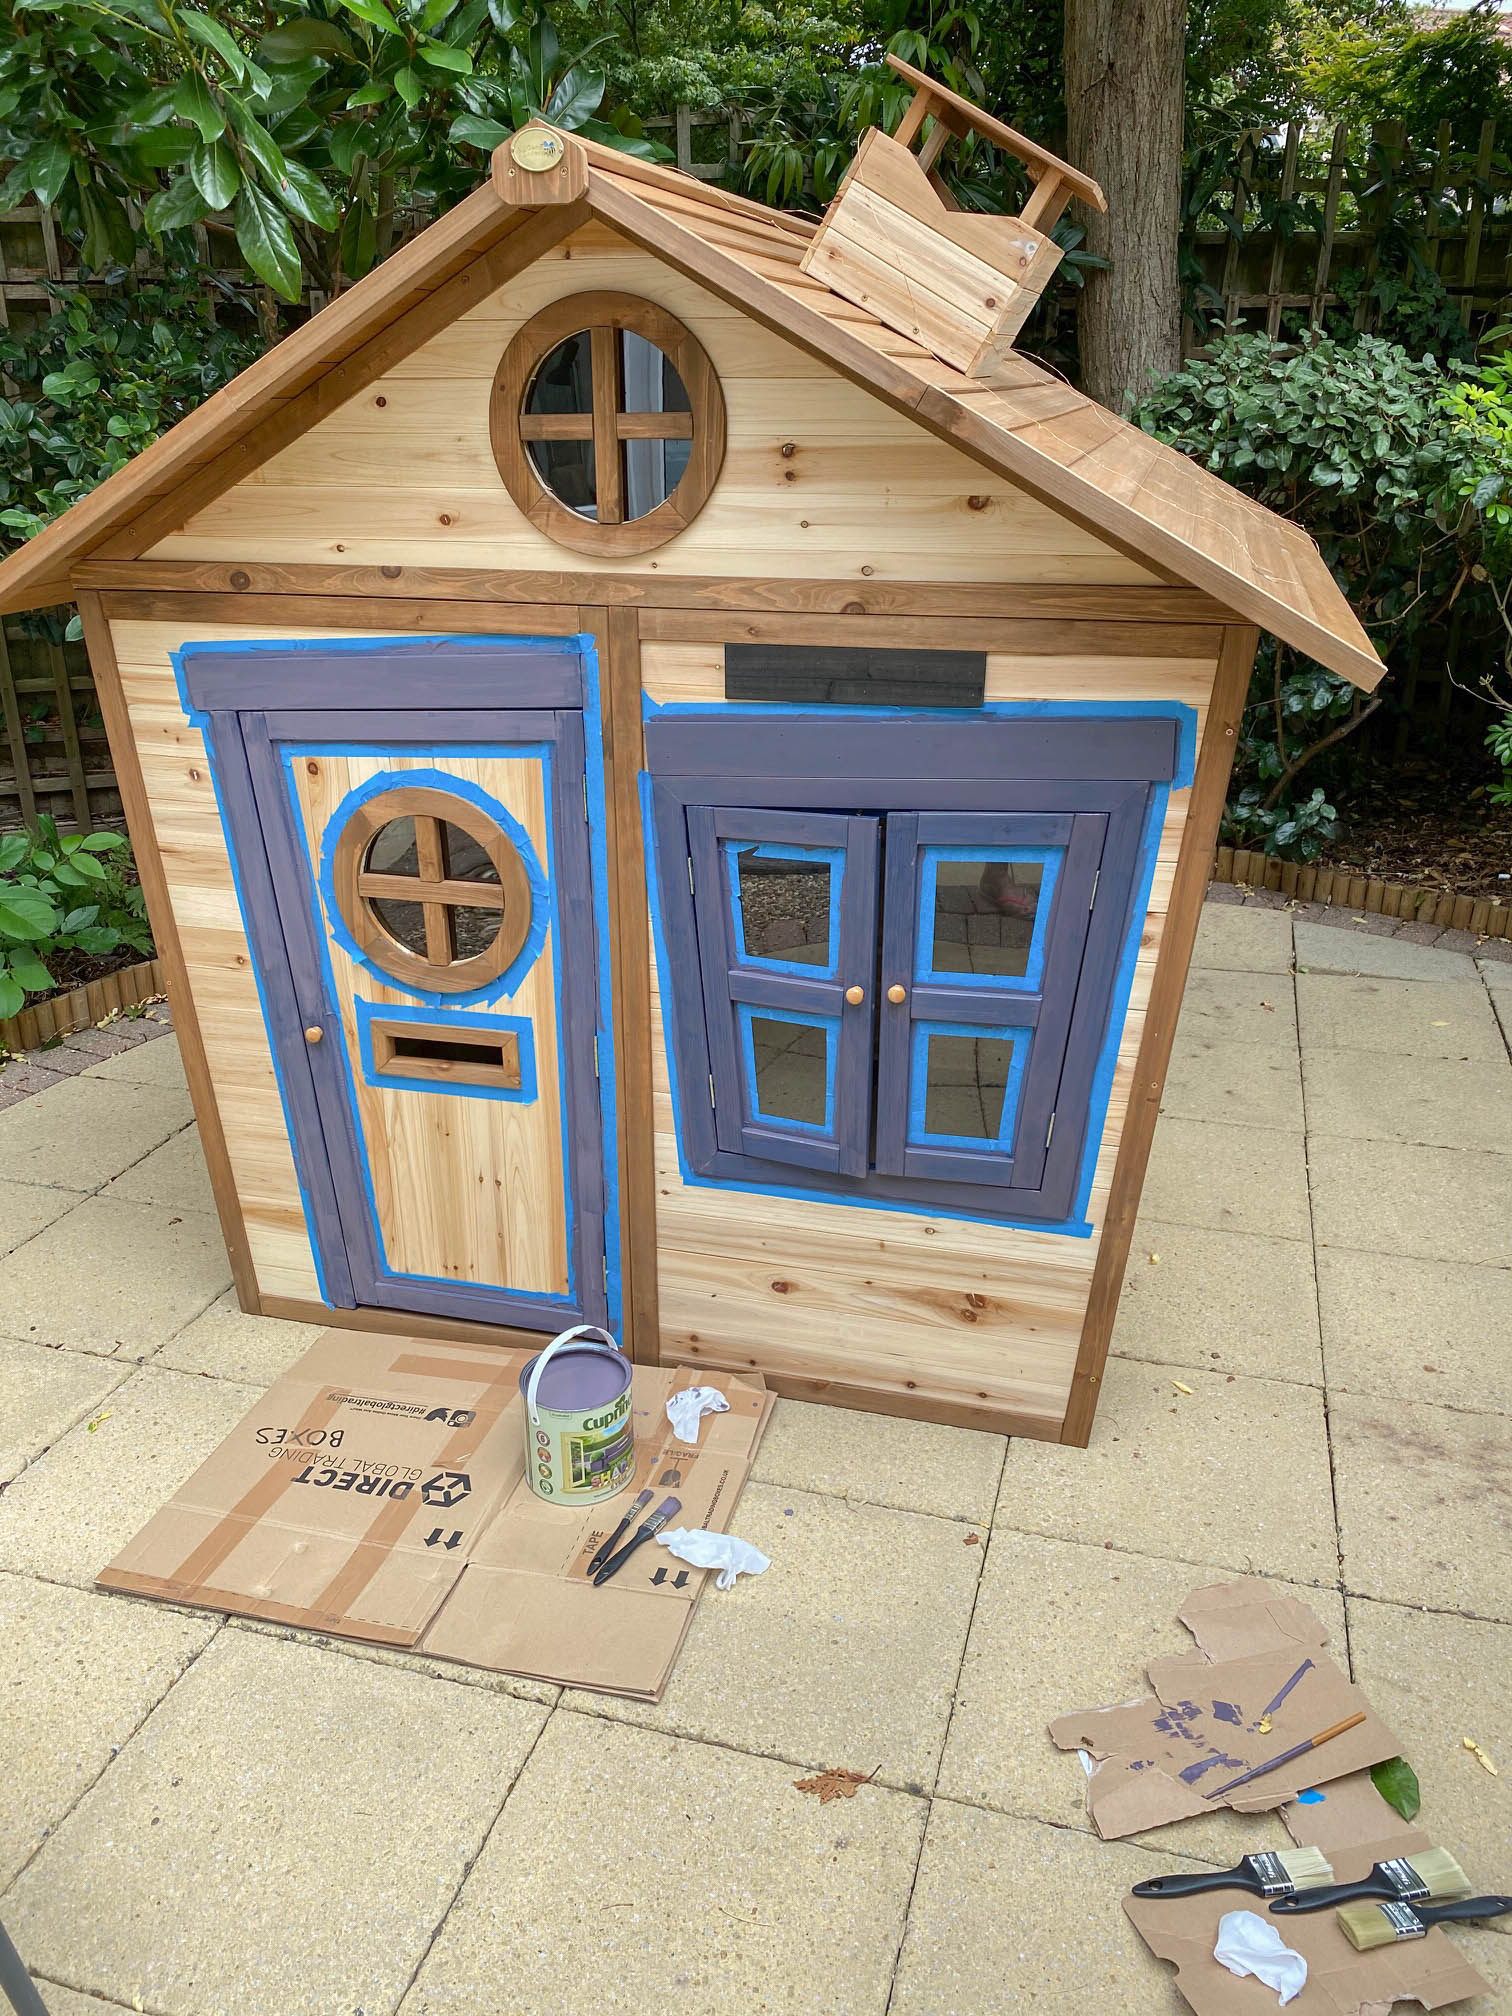
I painted the house 2-3 times and then it was done! The paint dried really quickly so I could do it all in 2 days (with breaks)!
For a rookie it was a very exciting project – but I did make a few mistakes. The biggest was that my brush sometimes made stains, because I had too much paint on it, and I didn’t see them before it was all dry! I am sure, that an expert would know which types of brushes to use for the perfect result and the right technique, but all in all, it is not difficult and I am very pleased with the outcome. (more advice here)
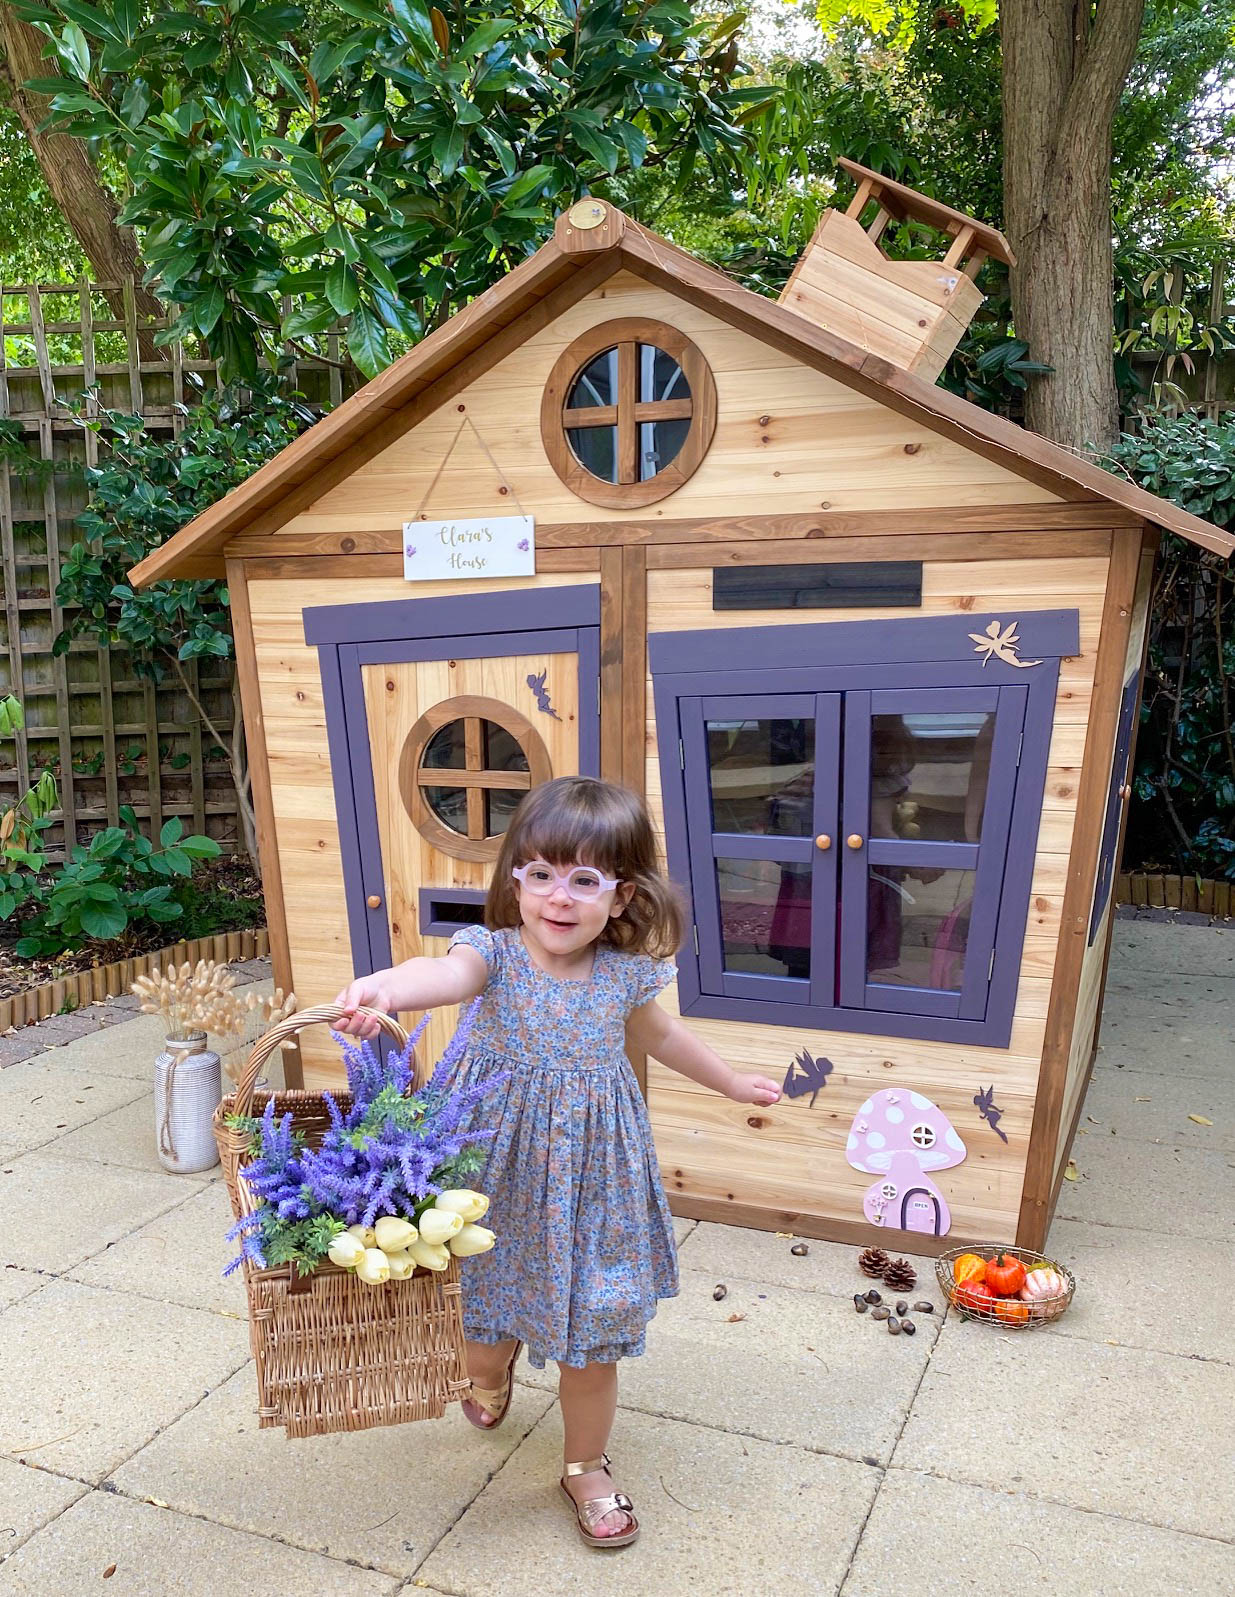
Taa-daaaa! (As Clara loves to say!) Isn’t it beautiful?

I spent a lot of time on the internet looking at playhouse decor – and I decided to buy beautiful wooden fairies on Etsy. The fairies arrived in nature wood, which was perfect, so I could paint them lavender to match the frames of the playhouse
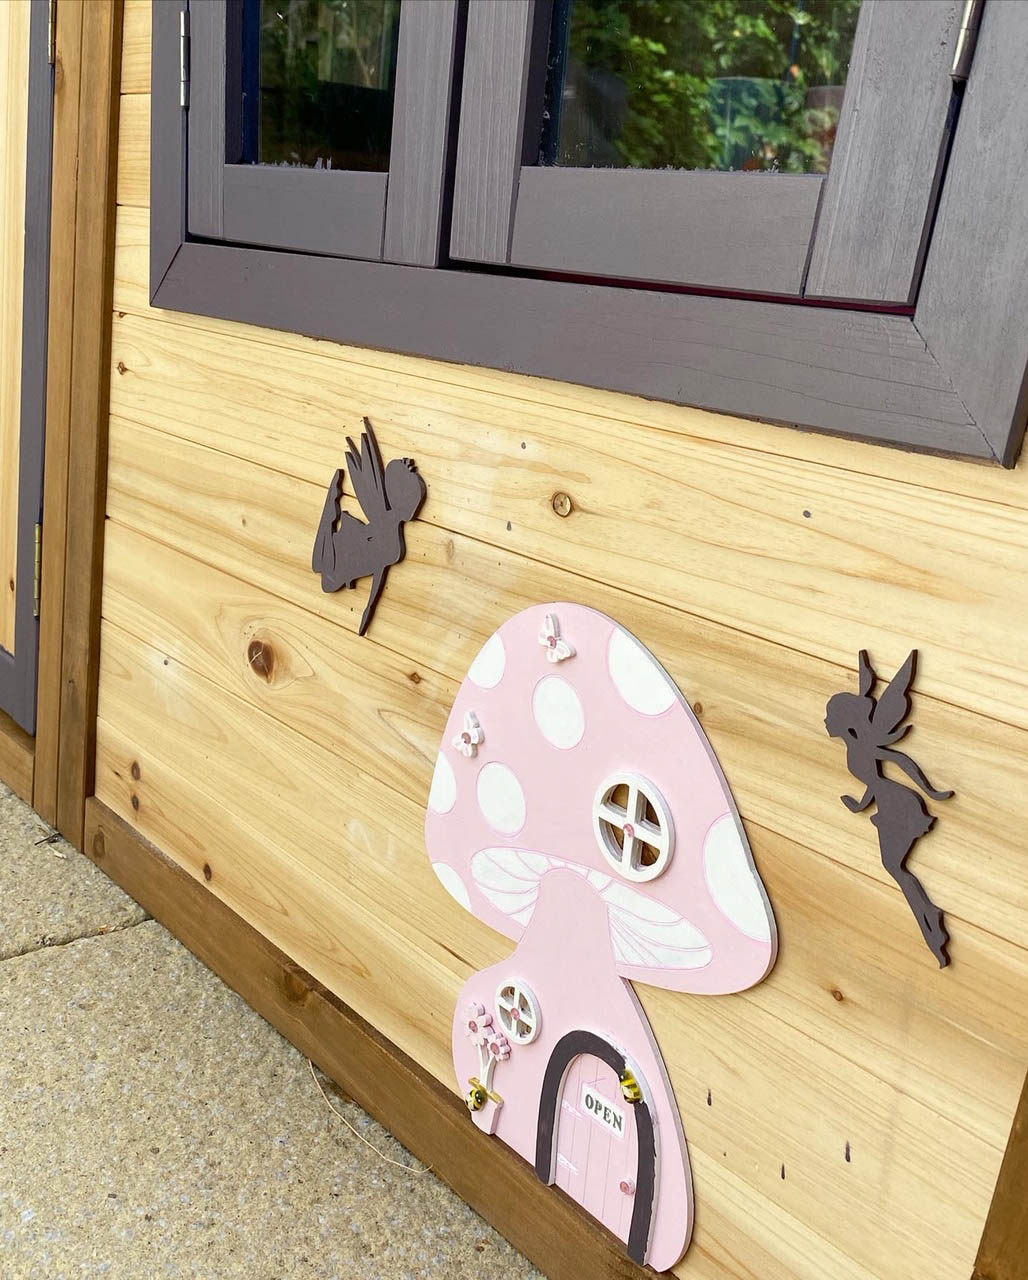
I also bought a Fairy house on Etsy and painted the door lavender to match. Tip: Use wood glue and make sure to hold it firmly in place until it is dry. As you can see there are a few lavender stains on the wood… I tried to remove them, but I didn’t succeed. From a distance you really won’t notice them, so it honestly doesn’t matter. Clara and I call them “shooting stars”
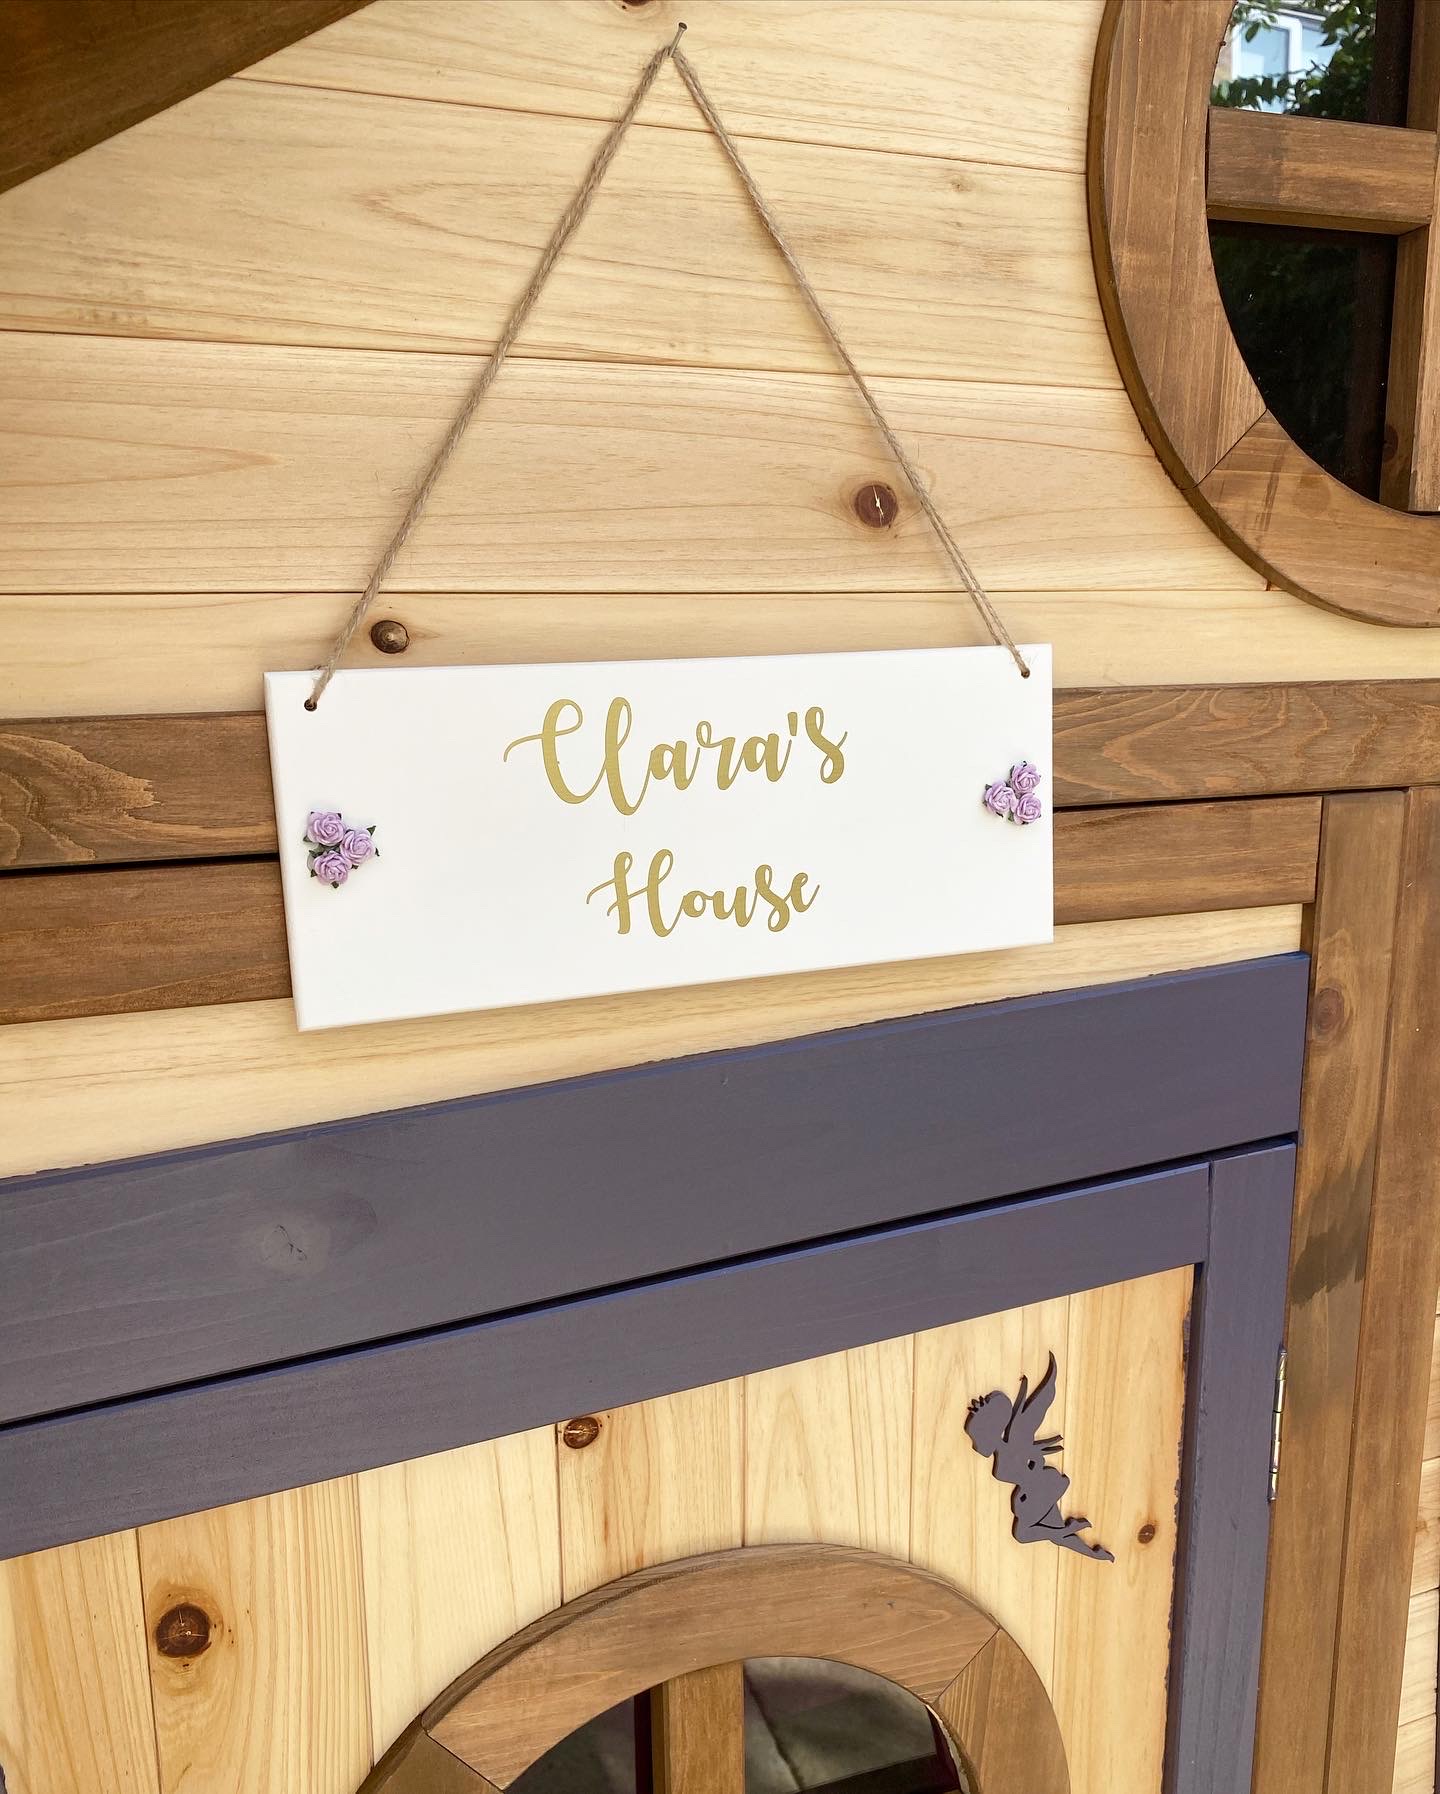
A personalised door sign for Clara! I love it and I just couldn’t help myself even though this playhouse does come with a chalkboard name plate
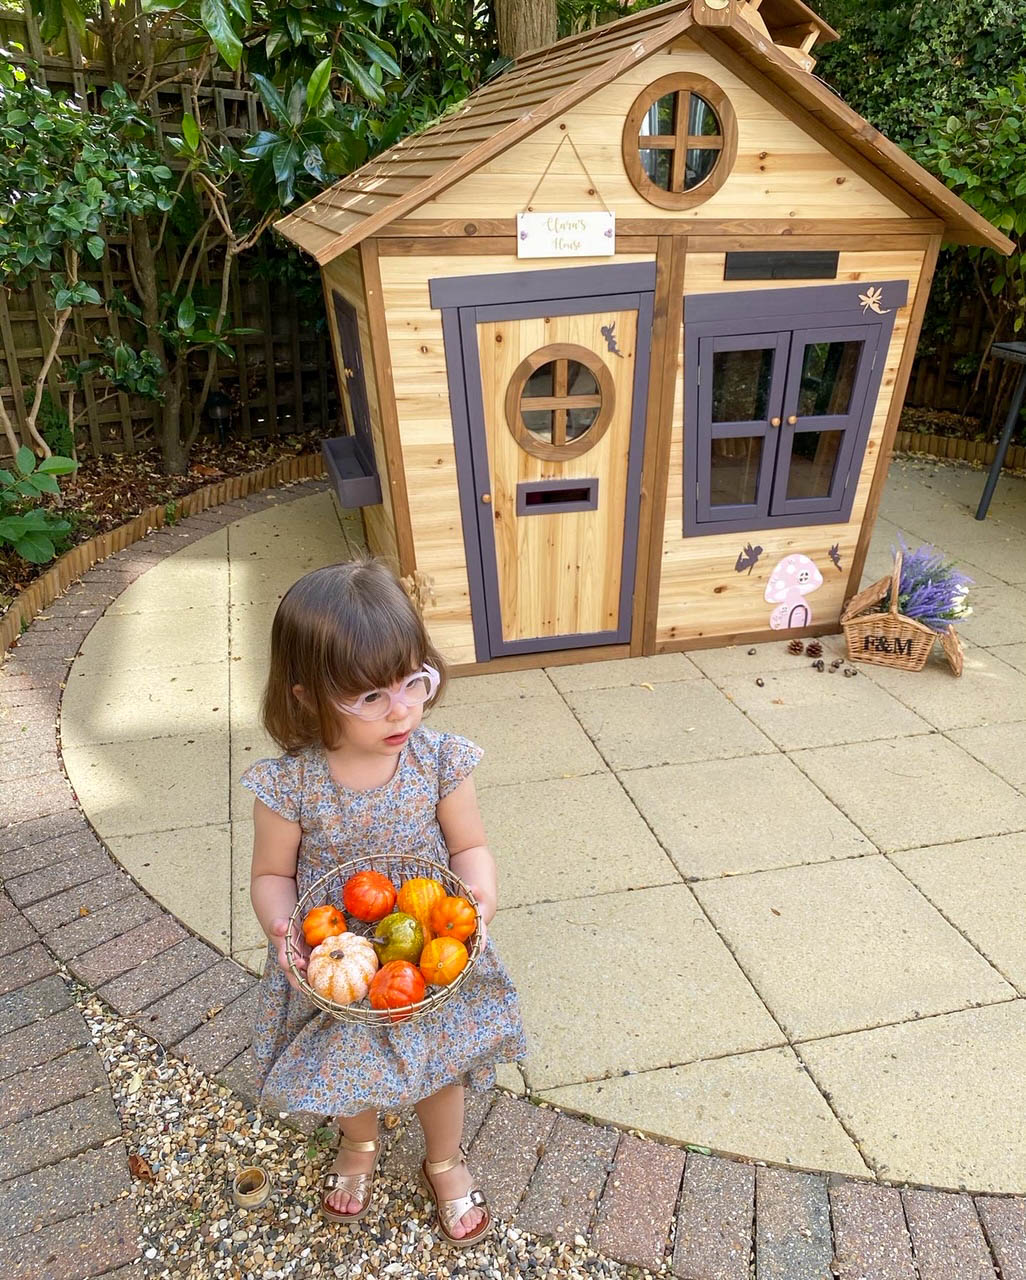
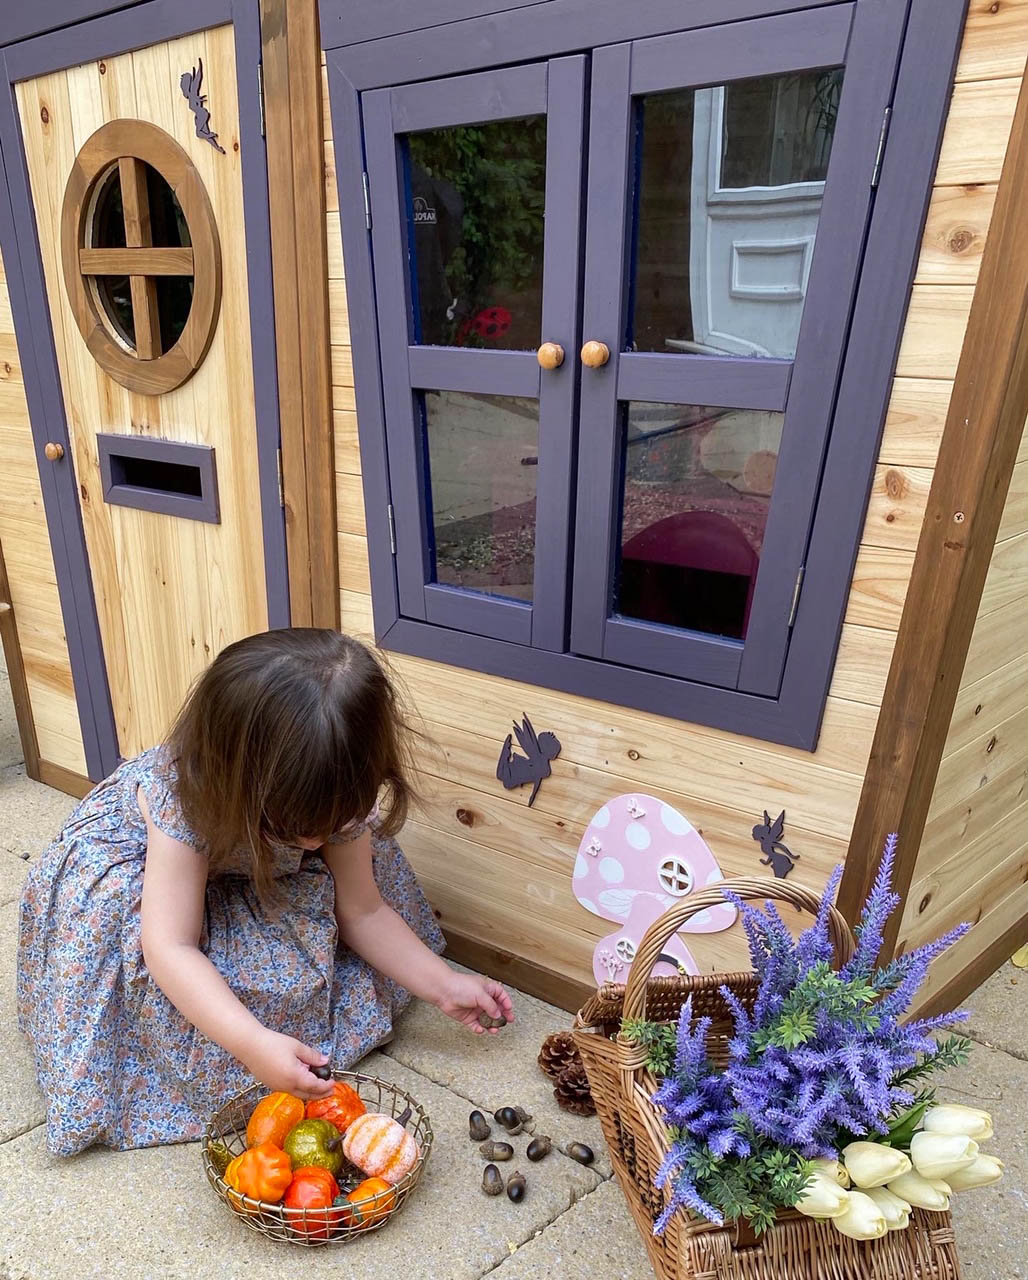
Early autumn vibes in our garden
I have learned a lot from the playhouse makeover. I am super proud of myself and so happy to see that Clara loves it even more now. Now, that Halloween is coming up, I am sure, that Clara and I will find a way to make it pumpkin pretty! I think the lavender colour is so perfect, because it goes so well with many occasions and seasons
We were gifted the Redwood Playhouse Mansion. All opinions (and DYI ideas) are as always my own


14 Responses
Wow I’m going to use this when I have to do this for baby L in a few years! Great post, thanks!
You should! She would love it!
What a great little playhouse! I would love in myself.
Haha! You can be Santa when we do Santa’s Grotto for xmas 😉
What an amazing playhouse and it looks like it was so much fun building and decorating it! Soo cute ??
Thank you Rubina. We really love the outcome too 🙂
This makes DIY look even more fun ! Such a pretty Playhouse. I love the little details you added and the sign above the door. Well done, she looks so pleased ??
Thank you Camilla. It actually wasn’t that hard 🙂
You guys made the building of Claras playhouse look so easy and fun! I love the cuteness and decor of it. I love those photos of Clara looking so pleased outside her playhouse. You did an amazing job B x
Thank you so B. That is super kind of you to say 🙂 We are pretty proud ourselves too 😀
Omg so cute she will treasure this space for such a long time and love that the whole family got involved ??
I really hope she will. Otherwise I am moving in haha 🙂
I loved watching this on your stories! It looks like Clara loves it, every little girls dream house!
It is really cute, isn’t it? We love it too 🙂